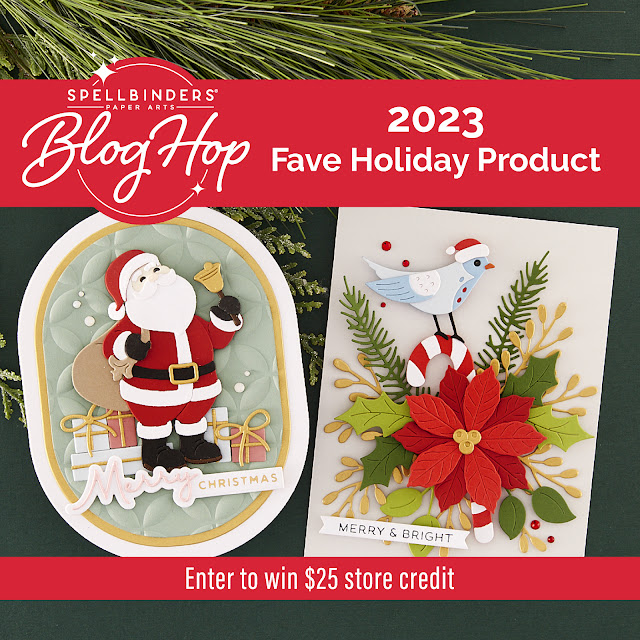
Highlighting A Colour Palette With White
Hello Crafters!
Have you ever chosen a colour palette only to find out that when you use it, it doesn't pop as much as when you first saw it? Well I have a foolproof trick to make those colours pop and it's actually really simple! All you have to do is add white! For this card, I did some dry embossing with a foil plate (Pinkfresh Studio Sneak Peak) and dressed up a foiled sentiment with a colour-specific palette of foliage!

Watch the Video on YouTube

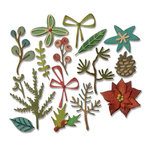
The first thing I did was pick out my colour palette. I found a couple peaches and greens that worked great together. I normally do some colour palette searches on google to find what I like. I chose Altenew inks and made my own cardstock in each colour: Pastel Sunrise, Canyon Clay, Olive, Hunter Green & Mountain Pine. I let these completely dry overnight before die-cutting. Then I used 3 die sets to cut out various foliage and flowers: Spellbinders Christmas Blooms, Sizzix Tim Holtz Funky Festive Dies & Altenew Layered Floral Dies. Once I had everything cut out using my Sizzix Sidekick, I assembled any little pieces like the berries on the branches or poinsettia layers with BearlyArt Glue. I also cut some pieces from Sizzix Opulent Ivory Glitter cardstock to add some sparkle to this colour palette.
For the background, I cut a piece of white cardstock to be 6.75" x 4.75". This is big enough to make a 5" x 7" card with a 1/8" border. You can use which ever size you desire. I used the Pinkfresh Studio Lush Vines Foil plate (This is a sneak peek as this hasn't been released yet! I think it will be available in the December release.) and used it to dry emboss this white cardstock. I had to run it through my machine twice to fill this larger panel. I did this carefully by placing the plate on one half of the cardstock and i would run it through as far as I could without completely rolling it through. This avoids creating any harsh lines or tearing your paper. I then placed the plate on the other half with a bit of an overlap and rolled it up to the join. Once complete you can see a bit of a line where the plate was placed and the pattern meets in the middle. DO NOT PANICK! This is no biggie! This join will get covered by the sentiment, foliage and embellishments. So if you have ever been afraid of making larger cards with cover plates due to this reason, don't be - this is how you work with the products and make it work for you 😊! I always find that some experimentation is key.

Next, I foiled the sentiment on more white cardstock using Spellbinders Essential Christmas Greetings Plates and Spellbinders Blush Foil. This matches the peaches in the flowers and even a rose gold or silver foil would work here. I used a rectangle frame from the Spellbinders Kaleidoscope Card Creator Die set to cut out the sentiment. Now, all I had to do was attach the sentiment piece with one foam square. I use only 1 in the center since I will be tucking the foliage behind this sentiment piece and will need room to do this - adding more foam would get in the way. I then arranged the foliage and flowers around the sentiment and adhered them in layers using my BearlyArt Glue. I tried to curve the ends of the flowers upwards to help create some dimension and I attached a couple of the flowers with small foam squares. Once I was satisfied with the foliage, I moved on to the card inside. This is important to do before adhering the front panel as adhering the panel first may mess up any stamping you wish to do inside.

I used my Altenew Blessings stamp set to stamp the main sentiment in VersaFine Clair Nocturne ink and the "Happy Holidays" sub-sentiment with Altenew Canyon Clay ink. I stamped this a bit off center because I also added some of the extra foliage pieces to the bottom left corner of the card inside to tie in the front to the inside. I also added a few Studio Katia Silver Foil Confetti bits for interest.
Finally, I adhered the card front and jazzed up the design with some Rose Gold & AB Crystal LolliBead Gems.
And that's my white-highlighted foliage Christmas card! This one was so fun to make and I love how all the colours came together and stood out on the white embossed background! I hope you have been inspired. As always, thanks for stopping by. And don't forget to leave me a comment, as I love hearing from you!

Supplies
(note: Any products not included here are linked within the blog text)


- Versafine Clair Ink-Nocturne

- Price: $7.99
- Sizzix - Sidekick - Starter Kit - White and Gray
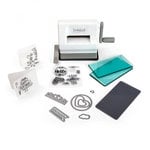
- Price: $40.59

- Bearly Art - Precision Craft Glue - The Original

- Price: $14.99


- Spellbinders - Glimmer Hot Foil System, NEW

- Price: $99.99
- Altenew - Dies - Layered Floral Elements

- Price: $21.58
- Silver Foil Confetti

- Price: $3.99

Comments
Post a Comment
Please leave me a comment as I always love hearing from you! 😃