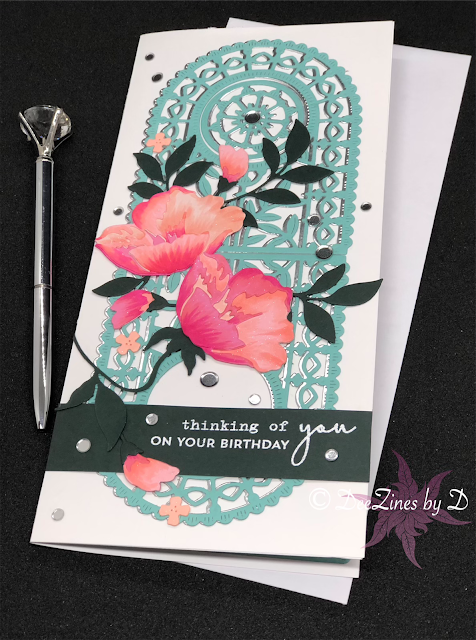
Slimline Buttercups | Colouring Die Cut Images
Hello Again! I have a slimline card for you today that features some copic colouring. I'll be using products from Altenew, Spellbinders and Pinkfresh Studios on the front and inside of my card.
I have a process video below if you'd like to watch along, and if not you can continue reading as I try to summarize this creation!
Card Front
- Die cut buttercup layers using Altenew CAF Buttercup dies and varying colours of pink Recollections cardstock and leaf fronds from Simon Says Stamp Midnight Green cardstock
- assemble and adhere layers of buttercup flowers together with BearlyArt glue
- Use Copic Ciaos RV04, R32, R20 to colour the buttercups and blooms with the brush tip, using a flicking motion. Blend colours from the darkest to lightest colour and then go over the darker colours to enhance the lines.
- Use the arch die and circle die from the Spellbinders Arched A2 and Slimline Card Creator die set to cut out 4 arches ( 2 from seafoam green recollections cardstock and 2 from Sizzix Silver Metallic cardstock) and 1 circles (2 from seafoam blue recollections cardstock and 1 from Sizzix Silver Metallic cardstock)
- then adhere green cardstock to the matching silver cardstock in an offset fashion to create a shadow look. You'll end up with 2 arches and 1 circle
- cut a 4 -1/4" x 9" slimline card piece from white cardstock and mark the center of the piece lengthwise
- adhere the 2 arches so that they meet at the center mark and adhere the circle in the circle area of one of the arches (top arch)
-arrange buttercup flowers, blooms and leaves on card front as desired and pick this up with some Press 'N Seal
- stamp "thinking of you" sentiment from Altenew BAF Columbine stamp set on Simon Says Stamp Midnight Green cardstock using Versamark Embossing ink and heat emboss with SSS Fine White embossing powder
- complete the same step as above using the "ON YOUR BIRTHDAY" sentiment from the MFT Twice the Wishes stamp set (you'll have to mask the 'blow it out' part of the sentiment)
- Cut the sentiment strip to size and adhere it onto the card base where desired keeping in mind where the arranged flowers will fall ( I placed mine over the bottom circle that I left open)
- then add glue to the back of the die cut flower arrangement picked up with Press 'N Seal and adhere to card front (allow time for drying before removing the press and seal)
- embellish card front with Studio Katia Silver Foil Confetti and use a Nuvo Aqua Shimmer Pen on the buttercup flowers
Card Inside
- Use Memento Tuxedo Black Ink (Copic safe ink) to stamp out large stamp from Pinkfresh Studios English Garden stamp set
-Use the same Copic Ciaos RV04, R32, R20 to colour the flowers in these images and G99 & YG67 to colour the leaves
- use Pinkfresh Studios English Garden coordinating die to cut out images
- cut out card base from white cardstock (8-12" x 9" and fold in center)
- cut out 4 strips using the strip die from the Spellbinders Arched A2 and Slimline Card Creator die set and seafoam green Recollections cardstock
- adhere 4 strips (2 at top to the left and 2 at bottom to the right) to the card inside to create a border
- then adhere the Pinkfresh Studio coloured die cuts around border of card and adhere circle floral in center of right side of card inside
- stamp out sentiment from Altenew Beautiful Inside stamp set in VersaFine Clair Nocturne Ink
-finally, adhere the card front to the card base ( I always leave this step until the very end, just in case I decide to stamp something on the left side of my card inside.)
And there you have my final card! I hope I've inspired you in someway or form. Please do not hesitate to leave a comment - I love hearing from you!


Comments
Post a Comment
Please leave me a comment as I always love hearing from you! 😃