Slimline Florals | Copic Colouring & Dry Embossing
Today I have a Simon Says Stamp heavy card for you. The SSS Slimline Florals stamp set came out a while back and I've been in love with it ever since. I recently purchased the stamps and coordinating dies and I'm ready to go wild with it! This is my first of many cards using this set and I hope you enjoy!
I will be entering this in this week's SSS Monday Challenge which is featuring creations that are "Inspired By an Artist". This card was inspired by one of my fav celebrity crafter's Yana Smakula (I'm pretty sure this is obvious by the look of this card😉).
There is a YouTube process video below for your viewing pleasure but if you'd rather read, you can follow along below.
I couldn't wait to use the SSS Slimline Florals set so needless to say that was the first thing I did...
- Stamp out long floral from SSS Slimline Florals in Memento Tuxedo Black ink (copic-safe ink) twice
- Colour the image with some Copic Ciaos in the following manner. (I just used simple copic colouring where you lay down your darkest colour, blend out with the medium and then blend out further with the lightest colour):
- large flowers B23, V04, V12
- Pointy Leaves BG09, G05, YG11
-round leaves BG15, YG41
- tiny flowers RV42, YR02
- flower centers Y02, Y17
- Add highlights with Sakura Gelly Roll Pen White 10
- Cut out images with coordinating die
- Colour white cardstock with C9 Grapefruit Dye Ink and let dry
- Use SSS Magnolia Branches embossing folder on the Grapefruit-coloured cardstock byr running through die cut machine ( I used the Sizzix BigShot Plus with the adapter A and it seemed to apply enough pressure)
- cut the embossed cardstock at a diagonal near the bottom of the cardstock and do the same using SSS Midnight Green cardstock so that it overlaps a little with the embossed piece
- Glimmer "Happiest of Birthdays" sentiment with Spellbinders More Sentiments glimmer plates in Blush foil on green cardstock
- cut out card base as a 4.5'' x 6" top folding card. I used two separate pieces of cardstock, one with a 1/4" lip to allow a seam to attach to the bottom piece of the card.
- Attach green glimmered cardstock to card base, then the embossed piece with strong adhesive
- Attach coloured slimline floral strip along join between green and embossed cardstock making sure not to cover sentiment using Bearly Art glue and Be Creative tape
Let's jump to the card inside now before full assembly and embellishing....
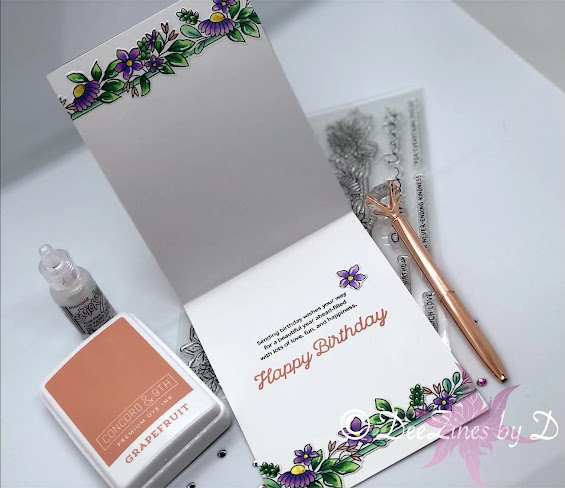
- Stamp out birthday sentiment from the Altenew Beautiful Inside stamp set using VersaFine Clair Fallen Leaves ink
- Stamp out the "Happy Birthday" sentiment from the MFT Twice the Wishes stamp set making sure to mask the rest of the sentiment ('to wonderful you") with washi tape before stamping with C9 Sorbet Dye Ink
- Adhere the left over slimline floral strip and pieces to the very top and bottom of the card inside cutting off any overhangs
- fussy cut out flower from leftover slimline floral piece and use Sakura Gelly roll pen to whiten copic coloured areas around the black outline of the flower. Adhere to inside of card near sentiment with glue
- Use Be Creative double sided tape to attach seam of top folding card base to bottom half of card
- embellish card front with AB LolliBeads using embellishing wand
- add some Diamond Stickles to flower centers on slimline floral strips, inside and outside card
- Use Tonic Nuvo Shimmer Pen to add shimmer to magnolia flowers on dry embossed portion of card
And that should do it! I hope you have been inspired in some way or form. Don't forget to leave me a comment, as I would love to hear from you😊!


Comments
Post a Comment
Please leave me a comment as I always love hearing from you! 😃