Quick & Simple Thank You Cards | Background Stamping & Stenciling
Hello again!
For today's post I have 2 quick Thank You cards that don't take that much time to make at all. These designs are definitely ones that you could use to mass produce to create many cards as needed, with the right assembly line. I've chosen to make these Thank You cards, but you can replace the sentiments with whatever you like.

If you are interested in viewing a tutorial video, I have one you can click on below. If not, the details of the creation of these two cards are listed below the link.
So I decided to use two different techniques: 1 card uses the Altenew Ditsy Print stamp set to stamp out a background and the 2nd uses the PinkFresh Studio Folk Garden Hot Foil Plate and stencils to create an ink-blended background.
Card # Front Panel 1
- Use the Altenew Ditsy Print stamp set with Altenew Tea Party Inks (Pink Pearl, Coral Bliss, Heart Beat) for the flowers and Altenew Green Meadows Inks (Minty Mint, Sweet Leaf) for the leaves to stamp out a background on 4.25" x 5.5" white Neenah Exact Index Cardstock, 110lb. I simply used an acrylic block for this layered stamping technique, as this stamp set is very forgiving if not lined up exactly so.
- Use the Altenew Camilia BAF Stamp set to stamp out the Thank You sentiment in VersaFine Clair Nocturne ink in the bottom left corner of the card
- fill in any large white areas with some more of the floral and leafy images
- Adhere to 8.5" x 5.5" light pink recollections cardstock card base, top folded
- embellish with PinkFresh Studio Jewels Mix in Pink and White using BearlyArt Glue

Card # Front Panel 2
- Use the PinkFresh Studio Folk Garden Hot Foil Plate and Spellbinders Silver Foil to foil a 4" x 5.25" white Neenah Exact Index Cardstock, 110lb panel using your hot foil machine. I used the Spellbinders Glimmer System but you can use what you have. If you do not have a foiling system, you can always use the coordinating stamp to stamp out the image in any ink or heat emboss it with metallic silver embossing powder for a similar look.
- Use the PinkFresh Studio Folk Garden Stencils (4 stencils) with Altenew inks and blending brushes to stencil on ink colours as follows.
Large Leaf stencil : Altenew Lagoon and Tide Blue inks (two-tone ink blended)
Detail Leaf Stencil : Altenew Emerald and Starlight Inks (two-tone ink blended)
3-opening flower stencil: Altenew Peach Perfect Ink
Final Flower Stencil (5-opening): Altenew Mango Smoothie and Cotton Candy Ink (two-tone ink blended)
- Use the PinkFresh Perfect Sentiments Foil Plate & Spellbinders Aura Foil to get the "Thank You" sentiment. Use coordinating die to cut out sentiments. Adhere sentiment with foam squares for dimension.
- Adhere to 8.5" x 5.5" cream Recollections cardstock card base, top folded, leaving a 1/8" border
- embellish with AB Crystal Lollibeads using BearlyArt Glue

Card Insides
- Use the Spellbinders Essential Glimmer Rectangles Plates and foil two of the second largest rectangle plate in Spellbinders Rose Gold & Spellbinders Silver Foil on white Neenah Exact Index Cardstock, 110lb
- Cut out these rectangles leaving about a 1/2" border
- Use the Thank You sentiment from the Altenew Sweet Peas Stamp set and stamp it in the center of the two rectangles with VersaFine Clair Nocturne ink
- adhere these two rectangles to the inside of each of the two cards
And there you have two quick and simple cards! This didn't take much time at all and it was so much fun. I hope you have been inspired and please feel free to leave a comment as I love hearing from you!
I'll leave you with a few more photos for your viewing pleasure!


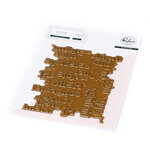
- Pinkfresh Studio - Hot Foil Plate - Folk Garden

- Price: $22.79
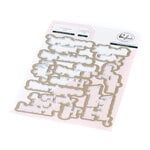
- Pinkfresh Studio - Dies - Folk Garden

- Price: $19.94

- Pinkfresh Studio - Layering Stencils - Folk Garden

- Price: $14.24

- Tsukineko - VersaFine Clair - Ink Pad - Nocturne

- Price: $8.57

- Pinkfresh Studio - Dies - Perfect Sentiments
- Price: $16.14

- Bearly Art - Precision Craft Glue - The Original

- Price: $14.99


- Scor-Pal - Scor-Tape 1/4" x 27 yds

- Price: $4.49
- Spellbinders - Glimmer Hot Foil System, NEW

- Price: $99.99


Comments
Post a Comment
Please leave me a comment as I always love hearing from you! 😃