PinkFresh Studio Folk Garden in Different Tones | Fun with Coordinating Products
Hello and thanks for visiting my blog today!
This post is all about using a set of products to get different looks. I'll be using the PinkFresh Studio Folk Garden foil plate, die, stamp and stencils. I'll be making 4 cards, inside and out, and I'll be getting different looks by using different foils, inks and tones of cardstock. I'll also design the card insides in 2 different ways - you can choose which you like best! So let's get started!

I started by foiling the PinkFresh Studio Perfect Sentiment plate with Spellbinders Rose Gold, Polished Brass and Silver foils. I die cut all of these out with the coordinating die, which is a time-saver. This is a one piece die that cuts out a bunch of sentiments with one run through my Sizzix BigShot Plus! I was able to foil and cut out all of those pieces in minutes! I also foiled the PinkFresh Studio Best Wishes sentiment plate in the same polished brass and rose gold foils on white and dark blue cardstock, respectively, followed by cutting them out with the coordinating die. I then foiled 4 backgrounds - it's best to use a larger piece of cardstock and then cut it down to size if necessary. I foiled the PinkFresh Studio Folk Garden plate as follows: rose gold, polished brass and silver foil on white cardstock and rose gold foil on dark blue cardstock.

I then used the stencils to ink blend these backgrounds with Altenew inks and Oxide inks as follows: (I chose to use the oxide inks for the dark cardstock so the colour would show up. If you do not have oxide inks which have a pigment component that allows it to sit on top of the cardstock, you can use pigment inks. A dye ink would just absorb into the cardstock and the colour would not really show up.)
Silver Foil on White Cardstock: Altenew Eastern Sky, Azurite, Pinkalicious & Pink Diamond inks
Rose Gold Foil on Dark Blue Cardstock: Tumbled Glass, Stormy Sky, Spun Sugar, Kitsch Flamingo & Picked Raspberry Distress Oxide inks
Polished Brass Foil on White Cardstock: Altenew Frayed Leaf, Forest Glades, Evergreen, Rouge, Crimson & Velvet inks
Rose Gold Foil on White Cardstock: Altenew Volcano Lake, Lagoon, Emerald, Lavender Fields, Deep Iris & Cosmic Berry Inks
I then foiled the Folk Garden plate again for each card except the last combination listed above. This is because the coordinating die doesn't cut out all the little whispy images and dots around the main floral images. Then I used the coordinating die to cut out the floral images. I used foam squares to adhere the images to their matching foiled cardstock. This wasn't to hard to do since the die cuts out about 5-6 pieces total so you do not really need to use a die-inlay technique unless you would really like to.


I then put these cards together using the Altenew Fine Frames Cover die with some Sizzix Opulent cardstock in Gold Matte and Rose Gold Metallic. I use also used the various sentiments that I cut out in the beginning to add sentiments to each card. I finished off the front with AB Crystal, Silver and Gold LolliBeads.
For the card insides I used two techniques. For the first one, I chose to use foiled cut out pieces of the Folk Garden set to decorate the top and bottom corners of the card inside. I used Spellbinders Polished Brass Foil on Dark Green cardstock and finished this off with a sentiment from the Altenew Blessings Stamp set in VersaFine Olympia Green ink. I then used some Nuvo Aqua Shimmer pen on the green images. The front of this card has a Christmas sentiment that I made using the Simon Says Stamp Large Written Merry Christmas die set. I cut out the shadow from Grafix Shimmer Vellum and the writing from Sizzix gold mirror cardstock.

The second technique was to use the PinkFresh Folk Garden stamp to stamp out a portion of the stamp on the top and bottom of the card inside. I used my washi tape to mask off any portions that I did not want to stamp out in VersaFine Clair Nocturne ink. I then stenciled the same colours from the front of the card onto the inside, making sure to mask off the stencil in the same places that I did not have a stamped outline for.
I added sentiments to the remaining cards as follows:
Silver Foil on White Cardstock: Altenew Engraved Flowers Stamp Set using VersaFine Clair Nocturne ink and Kitsch Flamingo Oxide ink
Rose Gold Foil on Dark Blue Cardstock: Altenew Positive Vibes Stamp Set using VersaFine Clair Nocturne ink and VersaFine Clair Twilight ink
Rose Gold Foil on White Cardstock: Mama Elephant Inside Birthday Messages using VersaFine Clair Nocturne ink
I then finished some of them off with some Studio Katia foil confetti sequins.
And these are the final card insides below.


So there you see we can get 4 different looks with different coloured inks, foils and cardstocks. And I can see there is another potential combination here with dark foiled cardstock on a white background. Go ahead and give it a try. Please let me know which card you like best in the comments!
I hope you were inspired and thank you for visiting my blog!


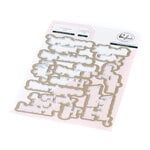
- Pinkfresh Studio - Dies - Folk Garden

- Price: $19.94
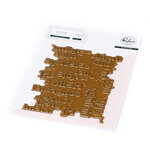
- Pinkfresh Studio - Hot Foil Plate - Folk Garden

- Price: $22.79
- Pinkfresh Studio - Layering Stencils - Folk Garden

- Price: $14.24
- Pinkfresh Studio - Dies - Perfect Sentiments
- Price: $16.14


- Altenew - Dies - Fine Frames Rectangles

- Price: $9.74
- Altenew - Clear Photopolymer Stamps - Positive Vibes

- Price: $23.39
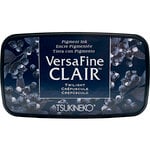
- Tsukineko - VersaFine Clair - Ink Pad - Nocturne

- Price: $8.57
- Tsukineko - VersaFine Clair - Ink Pad - Twilight
- Price: $8.57


- Pinkfresh Studio - Hot Foil Plate - Best Wishes

- Price: $6.64
- Pinkfresh Studio - Dies - Best Wishes

- Price: $5.69
- Nuvo - Aqua Shimmer Glitter Gloss Pens, 2 pk

- Price: $7.49


Comments
Post a Comment
Please leave me a comment as I always love hearing from you! 😃