Double Foiling on Dark Cardstock | Make The Cards Challenge 38
Hello Friends!
This week's Make the Cards Challenge 38 is a colour challenge and it's beautiful green! I have the Abstract Triangles Plate from Pinkfresh Studio that I used to do some double foiling, in two different coloured foils. And since the green is on the darker side, the foil will really stand out! Along with some ink-blending and washi, this made for a unique Christmas card!

Challenge Post

Watch the Video on YouTube

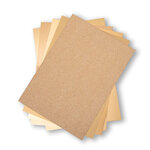
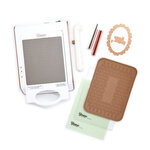
I cut a panel that was 1/4" larger than my foil plate (approximately 5" x 6") from Spellbinders Fern Green Cardstock. I then cut 2 pieces of foil the size of my plate with my Spellbinders Quick Trimmer from Opal Foil and Matte Gold Foil. I lined my plate up in the middle of my cardstock and taped it with some washi tape using the hinge method. I placed my Opal foil in between the cardstock and plate and then I taped it down with more washi. Once my Spellbinders Glimmer Foil System was warmed up, I placed my cardstock, foil and plate on the platform (plate-side down) and placed my shim and cutting pad on top. After the platform timer was finished I rolled it through my Sizzix BigShot Plus (this is normally why I don't show this part in my videos - it's huge!) Once foiled, I turned the plate 180 degrees (so I flipped the plate vertically) and foiled the panel again with the Matte Gold foil.
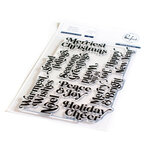
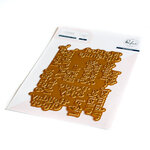
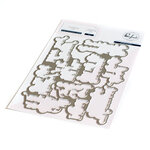
I used Rustic Wilderness Distress Ink and my ink blending brushes to do some ink blending along the edges of the panel. And I added a bit of Pine Needles Distress ink to the very edge to create a colour gradient drawing your eyes, inwards to the center of the panel where the foiling is. I had some Christmas sentiments set aside in a container that I had foiled a week ago using the Pinkfresh Studio Perfect Sentiments: Holiday plate and die. I actually foiled this plate 6 times using Spellbinders Black, Polished Brass, Silver, Green, Red and Rose Gold foils. And with the die that cuts out all of the sentiments in one go, I was left with tons of sentiments foiled, cut and ready to go for future projects. I highly recommend these products for this purpose because it is quick and easy, and saves a lot of time especially for holiday card makers/crafters! So I simply chose the "Seasons Greetings" sentiment foiled in black that I attached to my card panel in the center with foam squares.
I used the Pinkfresh Studio Poinsettia Washi, adhered it to some white cardstock and cut out the images with the coordinating die. I did this twice so get enough pieces for my card front and inside. I then arranged the die-cut pieces onto the card front with a mixture of foam squares and BearlyArt Glue. I embellished the panel with AB Crystal LolliBead gems.

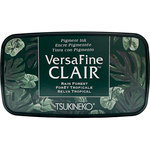
For the card inside, I cut a 10" x 7" center-folded card base (makes a 5" x 7" card) out of heavy white cardstock. I used the Rustic Wilderness Distress Ink and Pine Needles Distress ink to do some ink blending on opposite corners of the card, in the same manner as I did on the front. I tried my best to get the ink to blend out into the white of the card. You can do this by slowly decreasing the pressure you apply to your ink blending brush as you reach the inner areas of your card. It looks a bit blotchy at first but as it dries it tends to even out the colour a bit. Then I used some of the extra die-cut washi pieces and adhered them on top of the green areas with more BearlyArt Glue, to carry the design from the front to the inside. I stamped out my main sentiment using VersaFine Clair Nocturne ink and a stamp from the Altenew Blessings Stamp Set. And then I used the "Happy Holidays" sentiment from the same set, stamped in VersaFine Clair Rain Forest ink.
Once my card inside was complete, I added 2 strips of Sizzix Opulent Gold Glitter Cardstock to the top and bottom of my card front. I then attached my card panel with some Tombow Mono Dot Tape Runner.

And there you have it! That is my green colour-themed card for this challenge. I encourage you to check out the rest of the designer's inspiration and create your own card to link up to the challenge page for a chance to be this week's winner. I can't wait to see what you create!
As always, thanks for stopping by. And don't forget to leave me a comment, as I love hearing from you!

Supplies
(note: Any products not included here are linked within the blog text)


- Pinkfresh Studio - Christmas - Dies - Poinsettia

- Price: $20.89


- Spellbinders - Glimmer Hot Foil System
- Price: $113.99

- Tim Holtz Mini Distress® Ink Pad Pine Needles

- Price: $2.99

- Tsukineko - VersaFine Clair - Ink Pad - Nocturne

- Price: $8.57


This is a simply elegant card! Just stunning. (love the product links!)
ReplyDeleteThanks Jill! And I really have to thank you for your tips!
Delete