Foiling a Pattern - Tips & Tricks | Make the Cards Challenge 36
Hello and welcome back!
This week's Make the Cards Challenge 36 is another sketch challenge and I simply love these! They really give you the framework/main idea to create a really nice card. You can interpret it however you like and the possibilities are endless!
For my card today I'm going to be focusing on foiling and foiling tips! Please watch my YouTube video linked below to get a better idea of how to use these tips.

Sketch Challenge Post

Watch the Video on YouTube

Like what you're seeing? Pin this picture for later on Pinterest!
For this card, I started out with a slimline length panel in light blue cardstock. I will note that I saw this colour scheme used by Yana Smakula but my design is tailored to the sketch post. I watch a ton of YouTube videos and do a lot of Pinterest searches to get inspired so it's no wonder that I usually always have someone to accredit my inspiration to.
First, I made sure my Spellbinders Glimmer Foil System was nice and hot. Tip 1: I usually let my system heat up 5-10 minutes longer after the ready light has been lit up. This ensures my system is at maximal heat before foiling. I chose to use the Spellbinders Fanfare Border Glimmer Plates which comes with 3 borders, I used 2. I used the small bottom/straight edge border first. I lined it up with the bottom edge of my cardstock and taped it to the cardstock using washi tape. TIP 2: Use the hinge method to attach the plate to your cardstock with low tack tape, creating a hinge, which keeps the plate in alignment. Then I used my Spellbinders Quick Trimmer with the Foil knife to cut my Matte Gold Foil into a piece that was as wide as the pattern I wanted to create. TIP 3: this step is important as you will be using this one piece to continue your pattern along the width/vertically along your panel. I then lined up the foil under the plate and taped it into position with a bit more washi tape. Then I proceeded to foil this piece by placing it plate side down onto my glimmer system. I completed the sandwich with the spacer pad and the cutting plate that comes with the system and pressed the timer button. Some people do this differently (ie. completing the sandwich after the timer is up) but I find that this way works for me and my Sizzix BigShot Plus, which I use to apply pressure. You may have to try it differently at first to find out which process works best with your die cutting machine. I know that some people also add a cardstock shim in between the pads as well. It really takes some playing with to figure out what works best but once you know what works for your equipment, it usually works every time.

So once the timer as up I carefully and slowly put the detachable platform with the sandwich through my BigShot Plus. I find that rolling it through once is good otherwise I tend to get over-foiling. And if you do get this, don't panic or trash your foiled cardstock. TIP 4: I have the Couture Creations Detailer Tool, which is an electric eraser that has a small tip to allow you to erase any over foiling. You can always simply use a sand eraser as well. Always try this before you toss anything because it usually works 9 times out of 10.
Once I removed my foil I had to line up my next plate, which is that scalloped looking border. In order to do this, I line up and adhere my plate with washi using the hinge method. TIP 5: Then I place my used foil with the first border foiled out of it and line it up with the foiled area. The used foil looks solid again as you line it up. This ensures that the foil is where the plate is going to land on the cardstock and helps you make sure your plate is in line, even when the foil is covering your already foiled pattern. This is a bit of mouthful, so I really do recommend watching the video for this. Then I add another piece of washi to hold the plate in place and foil it on my machine. I continue in this manner vertically up and then to the right to complete my pattern. In the end I did have some double foiling due the plate shifting and having to foil twice because of under foiling. Once again, please do not toss this. You can always cover up these minor imperfections in your design.

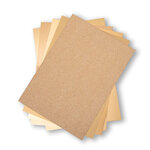
Next I cut a strip of Sizzix Gold Glitter cardstock and adhered it just below the center of my panel, using a ruler to make sure it is straight. I then adhered a white piece of cardstock and cut it down to the size of a slimline card (8" x 3.5"). I used Spellbinders Yana's Christmas Sentiments Glimmer plates to foil the Merry & Bright sentiment using the same foil on light pink cardstock. I cut this out using a frame die and I also cut this out of some Sizzix Matte Gold cardstock. I adhered these two frames in an offset manner to create a shadow.
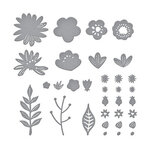
I used my Sizzix SideKick to cut out a bunch of die cuts using various coloured cardstocks:
- Spellbinders Simply Perfect Layered Blooms Dies was used for the flower buds, branches and little gold glitter flowers
-Spellbinders APG Pop Up 3D Vignette Poinsettia Sleigh was used to cut out the poinsettias and pine branches
- Spellbinders Slimline Kaleidoscope Hearts was used to cut out the long green leaf fronds
-Spellbinders Mini Slimline Envelope & Nested Card Creator was used to cut out some smaller green leaves
As you can see, I really sifted through my products to find dies from different sets that would work for my design. I find this is the best way to get great usage out of my products and I encourage you to do the same.
So I assembled all of these little elements with some BearlyArt Glue and I don't know if you can tell but I assembled the bud branches using the Simply Perfect Layered Blooms Dies to mimic the Spellbinders Christmas Blooms dies. I've been trying to get a hold of these dies and it's been impossible! So this is my alternative and it works quite well!
Finally, I arranged all of these elements on my card panel and attached them with glue and foam squares for dimension. I kind of made the foliage extending from the sentiment a lot more than the sketch, but as I said you can do what you want with the sketch as long as it follows the general idea. Also, by doing this, I was able to cover up some of the foiling mistakes I made! 😉
I finished off the front with some Black and White Crystal LolliBead gem embellishments.

For the inside, I foiled the straight edge border again with the matte gold foil on the light blue cardstock twice. I cut these strips out and adhered them to either side, top and bottom, of the card inside. I then added some more of the die cut elements that we had on the front to the bottom left corner of the card inside. I stamped out the sentiment using VersaFine Clair Nocturne ink and a sentiment from the Altenew Blessings Stamp Set.


And there you have the final product! I hope you have been inspired and go ahead and leave me a comment as I love hearing from you! Please let me know if these foiling tips work out for you or if you have any questions.
And don't forget to join the challenge over at the Make the Cards Challenge blog!
Thanks for stopping by.

Supplies
(note: Any products not included here are linked within the blog text)

- Spellbinders - Glimmer Hot Foil System, NEW

- Price: $99.99
- Spellbinders - Quick Trimmer for Foil and Paper

- Price: $15.99

- Tombow - Mono Sand and Rubber Eraser

- Price: $2.09

- Sizzix - Sidekick - Starter Kit - White and Gray
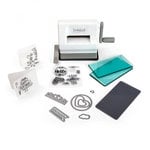
- Price: $40.59

- Bearly Art - Precision Craft Glue - The Original

- Price: $14.99
- Tsukineko - VersaFine Clair - Ink Pad - Nocturne

- Price: $8.57


So gorgeous! I have foiling plans in the near future, thanks for the tips!
ReplyDeleteThanks Allisa! It's so much fun, you'll be hooked! :)
Delete