Ink Blending on Embossing Christmas Cards
Hello Friends!
Today is actually World Card Making Day and I have 4 beautiful Christmas cards to share with you! This is a day when we celebrate both the art of creating handmade cards and the ability our heartfelt creations have to touch the lives of others. I hope you will join in the fun and make some thoughtful cards today!
The technique I'll be using today is actually very simple. As long as you have a blending brush, a dark and light tone of ink and some embossing powders, we can easily create this effect.
Like what you're seeing? Pin this picture for later on Pinterest!
I saw this technique recently featured on the Altenew YouTube channel and I've seen it done multiple times before. Sometimes you just need a reminder of certain techniques to get your creative juices flowing and that's exactly what happened to me. So I decided to apply this to my Christmas card making.
I simply chose some cardstocks of colours I liked and that I thought would suit the stamped images I have. The trick is to choose a lighter cardstock so you can ink blend darker tones onto it. I chose Mint Green Recollections, Light Pink recollections and Light Blue Recollections cardstocks. I cut two into a slimline panel and 2 into an A7 (5" x7") panel. I then stamped and embossed my images onto the panels, leaving an area a bit blank to allow for the lighter cardstock colour to show through. I stamped my images as follows:
1) Mint Green Slimline with Pinecone & pine images from Simon Says Stamp The Magic Of Christmas stamp set. Heat embossed with Altenew Rose Gold Embossing Powder.
2) Mint Green A7 (portrait) with festive border image from Simon Says Stamp Joyful Season stamp set. Heat embossed with Altenew Rose Gold Embossing Powder.
3) Light Pink Slimline with Mistletoe and Poinsettia images from Simon Says Stamp The Magic Of Christmas stamp set. Heat embossed with Ranger Silver Embossing Powder.
4) Light Blue A7 (landscape) with Snowflakes and border images from Simon Says Stamp Snowflake Season stamp set. Heat embossed with Ranger Silver Embossing Powder.
I then chose my inks for blending and used my makeup blending brushes to darken the edges of the panel. For a better visual, please watch my YouTube Video linked above. I just added ink to my brush and started my blending off the panel and then brushing in towards the center of the panel. This helps you keep the ink the darkest at the edge of the panel. And then I just blended the ink over the embossed images, making sure to leave an area blank (with the cardstock showing through), to help create contrast and a focal point for where I would place my sentiment. I continued this process with all of the panels and used Altenew Jet Black Ink to darken the outside edges just slightly. After the ink was applied, I made sure to wipe off the dye ink that would be resting on the embossed areas with a dry towel. The colours I used for each panel are as follows:
1) Mint Green Slimline with Pinecone: Altenew Emerald & Jet Black Inks
2) Mint Green A7 (portrait) with festive border: Altenew Galactic Stream & Jet Black Inks
3) Light Pink Slimline with Mistletoe and Poinsettia images: Altenew Cosmic Berry & Jet Black Inks
4) Light Blue A7 (landscape) with Snowflakes: Altenew Starlight & Jet Black Inks
Next, I assembled each panel with a focal point die cut and/or sentiment. The assembly and products I used for each are as follows:
1) Mint Green Slimline with Pinecone: Birch Press Merry Sugar Script die cut once from Sizzix Charcoal Metallic cardstock, and twice from black cardstock, stacked and adhered together. "Christmas" stamped from the Waffle Flower Oversized Merry set in Altenew Rose Gold EP on Dark red cardstock. I adhered the "merry" to the sentiment strip and then adhered it to the card on the left (in the lighter area) with a die cut mistletoe from the C9 Mistletoe Messages die set, cut out of the same charcoal cardstock.
2) Mint Green A7 (portrait) with festive border: PhotoPlay Peace & Joy die set was used to cut "peace" once out of Sizzix Ivory cardstock and twice out of my SSS mailer card** (or white cardstock), stacked and adhered together. "On Earth" stamped from the Simon Says Stamp Slimline Scene Builder stamp set and heat embossed in Hero Arts White Fine Detail EP. I adhered the sentiments together and then to the card center. **TIP: I tend to use the cardstock cards that Simon Says Stamp uses to send out their coupon codes for future orders with your deliveries, as cardstock to create stacked die cut sentiments. I think this cardstock is too nice to throw out and is nice and thick enough to help me build dimension. Just a thought to help decrease waste and save money.**
3) Light Pink Slimline with Mistletoe and Poinsettia images: "Merry Christmas" from the Simon Says Stamp Joyful Season set stamped in VersaFine Nocturne Clair ink on white cardstock, adhered to the right side of the panel with a die cut mistletoe from the C9 Mistletoe Messages die set, cut out of the same white cardstock with the matching bow in charcoal cardstock,
4) Light Blue A7 (landscape) with Snowflakes: Simon Says Stamp Eliza Snowflake die cut out of Simon Says Stamp Silver Holographic cardstock, adhered to top left of card. "Merry" from the Waffle Flower Oversized Merry die cut from Sizzix Ivory Glitter cardstock, adhered to card center over snowflake. "And Bright" stamped from same Waffle Flower stamp set in VersaFine Nocturne Clair ink on white cardstock, adhered to bottom of sentiment.
I then finished off these card fronts with some Red , Black, White, AB & Green Crystal LolliBeads, making some of these mistletoe berries and the rest just random gems throughout the panels. For the snowflake panel, I used PinkFresh Studio Jewel Mix in Light Blue and White.
For the card insides, I used the same stamping and ink blending technique but with a lighter hand. My goal was to get the colours to blend/fade into the white of the card inside. I stamped all of the images out with VersaFine Nocturne Clair ink and made sure the images were completely dry before ink blending. After cutting out the corresponding sizes of card bases (leaving a 1/8" border for both of the slimline cards), I decorated the inside as follows:
1) Mint Green Slimline with Pinecone & pine images from Simon Says Stamp The Magic Of Christmas stamp set. Ink blend from dark to light with Altenew Volcano Lake and Emerald Inks.
2) Mint Green A7 (portrait) with festive border image from Simon Says Stamp Joyful Season stamp set. Ink blend from dark to light with Altenew Volcano Lake and Emerald Inks.
3) Light Pink Slimline with Mistletoe and Poinsettia images from Simon Says Stamp The Magic Of Christmas stamp set. Ink blend from dark to light with Altenew Puffy Heart, Purple Wine & Midnight Violet Inks.
4) Light Blue A7 (landscape) with Snowflakes and border images from Simon Says Stamp Snowflake Season stamp set. Ink blend from dark to light with Altenew Eastern Sky & Starlight Inks.
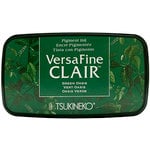
I then stamped out the sentiments using VersaFine Nocturne Clair ink and all of the black ink sentiments were from the Altenew Blessings stamp set. I then added the "Merry Christmas" and "Season's Greetings" stamps from the Simon Says Stamp Just For You Stamp Set using Warm Breeze, Green Oasis, Purple Delight and Medieval Blue VersaFine Clair inks.
And that's how I made these 4 ink blended Christmas cards, in a nutshell. I hope you have been inspired and please feel free to leave a comment as I love hearing from you! And don't forget to make your own cards for World Card Making Day!
- Mistletoe Messages dies

- Price: $20.00
- NEW! Ranger Anti-Static Pouch

- Price: $7.99
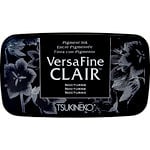
- Tsukineko - VersaFine Clair - Ink Pad - Nocturne

- Price: $8.57
- Scor-Pal - Scor-Tape 1/4" x 27 yds

- Price: $4.49
- Scor-Pal - Scor-Tape 1/8" x 27 yds

- Price: $3.59
- Lisa Horton Crafts - Ink Blending Wonder Brushes

- Price: $27.10
- Ranger Ink - Stickles Glitter Glue - Diamond

- Price: $2.19
- Embossing Powder Princess Gold, 1oz Jar

- Price: $4.99
- Embossing Powder Silver, 1oz Jar

- Price: $4.99
- Hero Arts - Embossing Powder - White Detail

- Price: $5.84


Comments
Post a Comment
Please leave me a comment as I always love hearing from you! 😃