Layered Stamping on Plain and Coloured Cardstock | Make The Cards Challenge 39
Hello Again!
This week's Make the Cards Challenge 39 is a sketch challenge and I thought this design would be perfect for creating a nice stamped background. This card design is Altenew-heavy because I love the layered stamps they have and thought they would work perfectly here. I did my stamping on some plain white cardstock and some light green cardstock to see how I could create different looks. And I'll also show you how to coordinate the card inside!

Challenge Post

Watch the Video on YouTube

I started with a 5" x 7" piece of white and light green cardstock. I chose a size larger than what I was going to use on my final panel so I could find the best part of my design to cut out. For this method, it is important to have a MISTI or any type of stamp positioner, especially if you are making more than one card like me. I decided to use the Altenew Dainty Bouquet Stamp set since it has a timeless classic look. Now, if you are new to layered stamping I'm going to go through how you get set up and get started. The first thing I do when doing layered stamping is I check out the stamping guide that Altenew includes on the back of their packaging. I figure out how many colours I will need; in this case I need 1 shadow colour, 2 flower colours and 2 leafy colours. This is a unique stamp in that it stamps the leaves and flowers first as a shadow and then you add colours to make the image stand out. The colours I chose were as follows:
Shadow layer - Altenew Morning Frost (choose a light colour here)
Flower layer 1 - Altenew Coral Berry (mid tone)
Flower layer 2 - Altenew Ruby Red (darker tone)
Leafy Layer 1 - Altenew Forest Glades (mid tone)
Leafy Layer 2 - Altenew Evergreen (dark tone)
If you are familiar with Altenew inks, you know they come in sets of 4 tones/shades in the same colour family. This makes it easy to pick colours to layer. In this case, you only need two colours: one light and one dark, so you can choose to go lighter or darker with your colours which also creates different looks. Generally, you choose a lighter colour for the first layer (covers more stamped area) and darker for the second layer (covers less stamped area) and so on. To get a better idea, please watch my YouTube Video linked above.

So I arranged my two largest flower images on my panel and stamped them out in Morning Frost all over the panel on both cardstocks. I simply arrange my stamps, ink them up, stamp, double stamp if necessary, then switch the cardstock and stamp again on the second panel. Then I repeated all of these steps until my panel was covered. I then selected the next layer of stamps, arrange them and continue in the same fashion for all of the layers. Using the stamp positioner saves me from having to reposition the stamp each time I move from one layer to the next on each cardstock panel. This is ideal for mass card production!
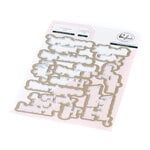
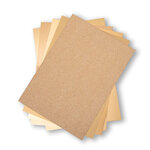
Once the panels were stamped out I used a rectangle die from the LawnFawn Scalloped Rectangle Stackables dies to cut out the panels. I decided to add some ink to the edges of the panel; I used Altenew Frosty Red on the white panel and Altenew Sweet Leaf on the green panel. I used the Altenew Fine Frames Die, which is another great product I recommend having. It cuts out a whole slew of frames in different sizes with one pass through your die-cut machine. I used this die with my Sizzix Gold Mirror cardstock and Sizzix Rose Gold Mirror cardstock. Then I chose a frame to use with my panels.


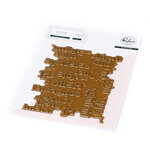
I chose my sentiments from my stash of already foiled and cut sentiments that I keep in a tin. I used the Pinkfresh Studio Perfect Sentiments plate and die and foiled a whole bunch of sentiments in different Spellbinder Foil colours. For this project, I used the Polished Brass and Rose Gold foiled sentiments. I cut some black cardstock strips to back my sentiments onto. After gathering all of these elements for my card front, I focused on designing my card inside, as I don't want to add anything to my card front yet since I want a smooth surface to stamp on.
I made my card bases out of heavy weight White Hammermill cardstock, sized 5" x 7" center folded. This size is a bit bigger than my panel and I noticed this after I designed my card inside, but it was ok for me to just cut off about 1" from the top to create a final card size of 5" x 6".
I used the same stamps and ink colours to stamp out the large floral image on the bottom left of the left side of the card inside. Except, in this case I used Altenew Evening Gray for the base shadow colour. I did this on both card bases and kept one clean white. On the second card, I used my large acrylic block and stamped out the same large floral image all over the rest of the card inside in Altenew Morning Frost ink. I love this look because it makes a nice watermark design on the card inside since the ink used is very light. Then you can always write on top of this in black ink. I find this adds to the classic look of the card.

I stamped out the sentiment from the Altenew Say It With Love stamp set with VersaFine Clair Nocturne ink. Once the card insides were dry, I arranged the elements on the front of the card like the design sketch. I used some Artist-Tac Dry adhesive to attach the frames and popped up the sentiments with some foam squares for dimension. I finished off these cards with some Nail Art Gems from Amazon. These are not the usual gems I use but they are just as good and I wanted to show you here that many of these nail art gems are great to use for cards! The best part is that the item I linked comes with an embellishment wand, if that's what you are looking for (note: this particular link is not an affiliate link but I've linked it because I like it and think you would too). And there you have my two Thank You cards in two colours made with mostly stamping techniques!
I encourage you to check out the rest of the designer's inspiration and create your own card to link up to the challenge page for a chance to be this week's winner.
As always, thanks for stopping by. And don't forget to leave me a comment, as I love hearing from you!

Supplies
(note: Any products not included here are linked within the blog text)
- Altenew - Clear Photopolymer Stamps - Dainty Bouquet

- Price: $23.39
- Ranger Water-Based Stamp Cleaner, 4oz

- Price: $4.99
- Altenew - Dies - Fine Frames Rectangles

- Price: $9.74
- Pinkfresh Studio - Dies - Perfect Sentiments
- Price: $16.14

- Tsukineko - VersaFine Clair - Ink Pad - Nocturne

- Price: $8.57


- Bearly Art - Precision Craft Glue - The Original

- Price: $14.99
- Tombow - Mono Adhesive Dots - Dispenser

- Price: $5.79

- Spellbinders - Glimmer Hot Foil System, NEW

- Price: $99.99


So pretty, love your amazing layered flowers.
ReplyDeleteThank you Alissa!
Delete