Metallic Watercolour Backgrounds | Two Cards - Two Looks
Hello Friends!
Today I'm sharing another technique with my Arteza Metallic Watercolours. These paints showed up so nicely on black cardstock that I couldn't resist using them to paint in a background stamp. And it's actually really easy to do - you don't need to be an artist! As long as you have some embossing powders this technique is simple.
Watch the Video on YouTube
So I'm going to make 2 backgrounds, both using Legion Stonehenge Aqua Watercolor Pad, 140lb, Cold Press, but with different watercolours and embossing powders. I first cut 2 square pieces of black watercolour cardstock that were big enough to fit the Simon Says Stamp Flora Background stamp (about 7" x 7").
Card 1 Background
- Stamp out the SSS Flora Background stamp using stamp positioner with VersaMark/embossing ink (I recommend this for big stamps like this incase you need to double stamp.)
- heat emboss with Ranger Clear White Embossing Powder
-Tape down embossed cardstock to a wooden board (I used a cheap cutting board I picked up from the dollar store) with some painter's tape, covering edges only (not stamped image). You might want to stick the tape to your arm before application to remove some of the tackiness to prevent ripping during removal.
- Use water brushes and Arteza Metallic Watercolor Paints in Frosty Blue, Bronze and Diamond White to paint background in the following manner:
I use 2 water brushes because it makes the process easier and saves me time on refilling the water. I use one brush to add just plain water to the area I want to paint. Than I pick flowers/buds that are not touching and wet them. With the second brush, add the Bronze to the brush and simply touch the brush to the bottom of the bud image. The water you already placed there will actually pick up the colour and move it upwards. (For a better idea, please watch my YouTube Video linked at the beginning of this post.) Then add the Frosty Blue ink, in the same manner, to the centers of the bud images and the White Diamond to the tops of the buds. The water you placed down first will help each colour blend into each other. If you notice your image is really full of water, you can use the tip/edge of a paper towel to adsorb some of the extra water by just touching it to the water coloured area. Continue in this manner until all the bud images are painted.
- Use some white acrylic paint and splatter it onto the painted background only after it is completely dry. You can dry yours quickly with a heat gun or allow it to dry overnight.
-Remove the tape once the ink splatter has dried. With this cardstock, some of the black fibers seems to come off with the tape so I just cut these edges off.
Card 2 Background
This was done in the exact same way as card 1, except for the following:
- heat emboss with Hero Arts White Embossing Powder
- Use water brushes and Arteza Metallic Watercolor Paints in Iridescent Pink and White Diamond to paint background in the same manner explained above.
Now to assemble the card, I cut down each panel right up to the stamped image. I stamped out the "happy" sentiment from the Simon Says Stamp Holiday Sparkle Greetings set. To get the sentiment to cut correctly with the die, place the die on your paper, line the stamp up inside the die and then pick up the stamp with an acrylic block or your MISTI. Then remove the die as it will stick to your stamp. I did this twice, one heat embossed with Ranger Silver EP on black cardstock and another stamped with VersaFine Clair Nocturne ink on white cardstock. I cut these out with the coordinating die. Another technique for this is to cut the die first, put the die-cut back into the negative piece and then stamp on it.
I used the "Happy Birthday" stamp from the Simon Says Stamp Garden Greetings set and only stamped out the "birthday" portion for each card. I stamped one and heat embossed on black cardstock with Ranger Silver EP and the other was stamped onto a Vellum strip after I adhered the "Happy" die cut (to help with positioning). Now I stamped the image on the Vellum with VersaFine Clair Nocturne ink and I want to note that this is a pigment ink, so it sits on top of the vellum. To prevent this from smudging you could use Staz-On ink or just heat emboss this with some Clear White EP, which is what I did. For the black cardstock sentiment, I glued the birthday sentiment strip to the bottom of the tail from the happy sentiment.
For card 1, I attached the sentiment with foam squares and for card 2, I folded my Vellum around the card panel and adhered it on the back. I finished these card fronts with some AB LolliBead gems embellishment for card 1 and for card 2 I used some PinkFresh Studio Pink Jewels as well.
Card Insides
Since these are square panels, I had to cut two pieces of cardstock (one with a 1/4" lip, scored) and attach them after decorating to make a complete card base (see below).
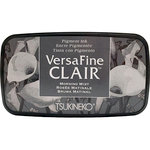
But before attaching the two pieces, I decorate the left side of the card inside. I measured a 2" panel on the left side and attached some post-it tape to the right of the 2" panel. This is to mask off the right side of my card. I then lined up the same Flora Background stamp so it would stamp on the 2" panel. I used my stamp positioner and stamped this out with some VersaFine Smokey Gray ink (don't think this is available anymore, so I linked VersaFine Clair Morning Mist). I then adhered a small strip of light blue cardstock to card 1 and light pink to card 2, where the stamped image meets the white unstamped area, with BearlyArt Glue. This creates a nice left hand border. It is important to note that I will not decorate the right side until I assemble the entire card base. This is because, I may have to cut up any overhanging bits and this will change the size of the right hand side panel.
Next, I assembled the card base. I folded over the score line for the lip and added a strip of Scor-Pal 1/4" double-sided tape. I lined up the right side of the card in the left side and then pulled off the backing of the tape and folded over the lip. When you open up the card everything should be aligned in theory, but that's not always the case, as the fold sometimes pushes the right panel outwards. This creates an overhang that you can simply cut off. Then you can decorate or add your sentiment to the right side panel, with out things being off-center or being cut off.
I finished the inside with a couple birthday sentiments from the HoneyBee Stamps Inside Birthday Sentiment set. I stamped the main sentiment in VersaFine Clair Nocturne ink . Then I stamped the Happy Birthday with VersaFine Clair Warm Breeze ink in card 1 and with Kitsch Flamingo Oxide ink in card 2.
Finally, I attached the card front panels to the card bases and I was almost done. I added a bit more pizazz by using Diamond Stickles on the buds on the inside of the card to create some sparkle!
That metallic paint is stunning on the black and I'd love to know which one you like best in the comments! I hope you have been inspired and hope you have a great weekend!
- Ranger Ink - Basics Embossing Powder - Clear

- Price: $4.74
- Ranger Ink - Basics Embossing Powder - White

- Price: $4.74
- NEW! Ranger Anti-Static Pouch

- Price: $7.99
- Original MISTI

- Price: $60.00
- Tsukineko - VersaFine Clair - Ink Pad - Nocturne
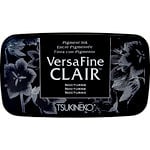
- Price: $8.57
- Bearly Art - Precision Craft Glue - The Bundle

- Price: $24.99
- Scor-Pal - Scor-Tape 1/8" x 27 yds

- Price: $3.59
- Journey Vellum

- Price: $9.95
- Ranger Ink - Stickles Glitter Glue - Diamond
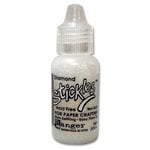
- Price: $2.37







I prefer the blue but both are beautiful! By the way Amazon has the gems!
ReplyDeleteThank you! You are the first to tell me you like the blue and I'm so glad you like it! Also, thanks for letting me know that Amazon has the gems - I'll have to add that to my future videos and I hope it's ok to mention your name?
Delete