Monochromatic Stamping with Metallic Accents
Hello Friends!
Believe it or not, there are eight weeks left until Christmas! So, today I have two Christmas cards to share with you. I'm going to be stamping out one panel and then I'll cut it down to make two cards. This is a great technique because you can get more than one card out of one stamped panel. I'll be using some monochromatic stamping which creates a nice classic look, especially when paired with metallic or mirror cardstock.
So let’s get to it!
I started off with a 5” by 7” panel of white cardstock and
set it up in my MISTI to stamp with some grey Altenew inks. I chose to use the AltenewBuild A Flower Poinsettia stamp set end to give this more of a softer look, I
chose not to stamp out the outline image. I placed the poinsettia stamp in
different areas of the panel and stamped out all of the layers and the following
manner:
Layer 1 – Altenew Silver Stone Ink
Layer 2 – Altenew Industrial Diamond ink
Layer 3 – Altenew Pure Graphite ink
Then to fill in the white areas of the panel I stamped out some pinecones
from the Sunny Studio Christmas Trimmings stamp set. I also filled the space with
some holly leaves from the Altenew Peaceful Wreath stamp set. I chose to use these
leaves as opposed to the ones in the Sunny Studio set because they fit my panel
better. And I used the same Altenew inks to maintain the monochromatic effect. To fill in any other small spaces I
used the berries from the poinsettia stamp set. (Please note that some of these sets are old and I've linked similar items in the supplies list.)
Next I measured halfway in on the long side of the panel (3.5” in) and made a tick mark with my pencil. I then cut out a triangle from the centre of the panel by making a cut line from one diagonal edge to the tick mark on one side and then the same on the other side. This left me with three triangles: one large and 2 small. I used some Altenew Industrial Diamond ink to add some ink to the edges of the triangles with a blending brush. This gives it a softer look by decreasing the black on white contrast a bit.
Next, I decided to cut out my accent pieces. I used the APG 3D Pop Up Vignette Poinsettia Sleigh (Nov 20' APG DOM) from Spellbinders to die cut some small poinsettias from Sizzix Gold Mirror and Matte Gold Cardstocks. I assembled these using some BearlyArts Glue. I also cut out some poinsettias from Copper Recollections cardstock using the Spellbinders Shapebilities Layered Poinsettia Dies. I chose to shape these using the Spellbinders Tool N’ One stylus tip and assembled them like the gold poinsettias. For other accents, I cut out some leaf fronds from Shimmer vellum using the Spellbinders Kaleidoscope Hearts set and some small flowers from the Spellbinders Always Welcome Door Base (LDOM Oct 20').
To make my triangle panels stand out, I added some strips of glitter cardstock to the edges. I used Sizzix Opulent Gold Glitter cardstock for my gold accent card and Some Copper Glitter cardstocks from DCWV Glitzy Metallics 6" x 6" stack of cardstock for my copper card.
I cut out 5” x 7” panels from Sizzix Opulent Gold Pearl Cardstock. This is a nice one because it looks white but has a shimmer of gold in the light. I positioned my triangles on my panels and marked with a pencil where I would be placing them. I then heat embossed my sentiments using Ranger Princess Gold and Ranger Rose Gold Embossing Powders for each card. I use the Simon Says Stamp Stained Glass Greetings stamp set for this. I then erased my pencil marks and added my triangle pieces with Tombow Tape Runner and Scor Pal double sided adhesive. I glued on my poinsettias, leaf fronds and small flowers where appropriate. And then I embellished the panels with some Clear and AB CrystalLolliBeads.
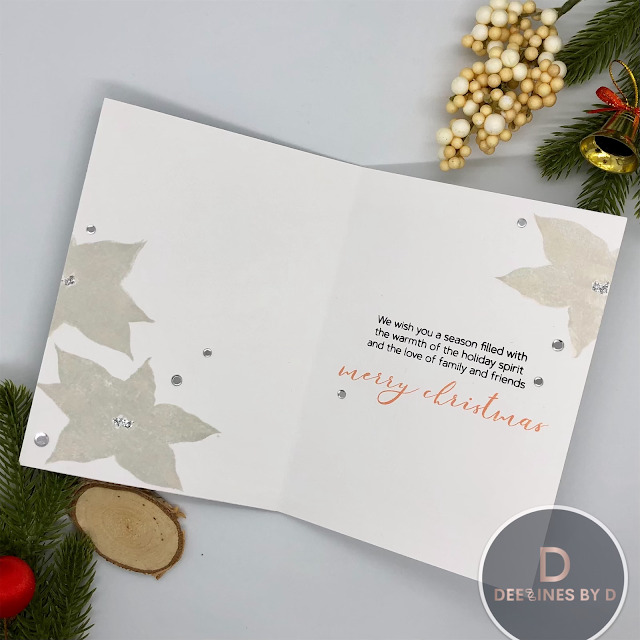
For the inside of the card, I used the same design I used on some cards I made in a past post. I will link that here if you are interested in seeing that. The products I used for the inside were :
Gold Card -> Altenew Build A Flower Poinsettia stamp set with AltenewMorning Frost Ink and Encore Gold Ink. Altenew Blessings Stamp Set for the sentiment in VersaFine Clair Nocturne ink. Studio Katia Gold Foil Confetti and Golden Rod Stickles.
Copper Card -> Altenew Build A Flower Poinsettia stamp set with Altenew Morning Frost Ink and Hero Arts Unicorn Peach Pigment Ink. Altenew Blessings Stamp Set for the sentiment in VersaFine Clair Nocturne ink and Altenew Rouge ink. StudioKatia Silver Foil Confetti and Pink Taffeta Stickles.
So as you can see this is a simple process that you can use to make many cards and you can cut your panels any way you'd like. Perhaps you could die cut a circle or square from the center and use the two pieces on two cards as well. The possibilities are endless!
I hope you were inspired! And as always, thanks for stopping by. Don't forget to leave me a comment, as I love hearing from you!
- Stylus Tips for Tool n' One

- Price: $4.99
- Shapeabilities Layered Poinsettia Etched Dies

- Price: $19.99
- Spellbinders - New Tool 'n One

- Price: $11.99
- Scor-Pal - Scor-Tape 1/8" x 27 yds

- Price: $3.59
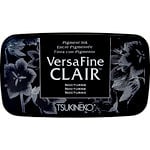
- Tsukineko - VersaFine Clair - Ink Pad - Nocturne
- Price: $7.91
- Bearly Art - Precision Craft Glue - The Original

- Price: $14.99
- Ranger Ink - Stickles Glitter Glue - Golden Rod

- Price: $2.19
- Tombow - Mono Adhesive Dots - Dispenser

- Price: $5.79
- NEW! Embossing Powder Rose Gold Metallic

- Price: $4.99








Gorgeous cards, Deepa! I hope you don't mind if I case your beautiful cards.
ReplyDeleteThank you Carol! No problem…I aim to inspire!! Please don’t forget to mention me when you share! 🙂
Delete