Acetate Double Fold Card | Make The Cards Challenge 43
Hello and Happy Wednesday!
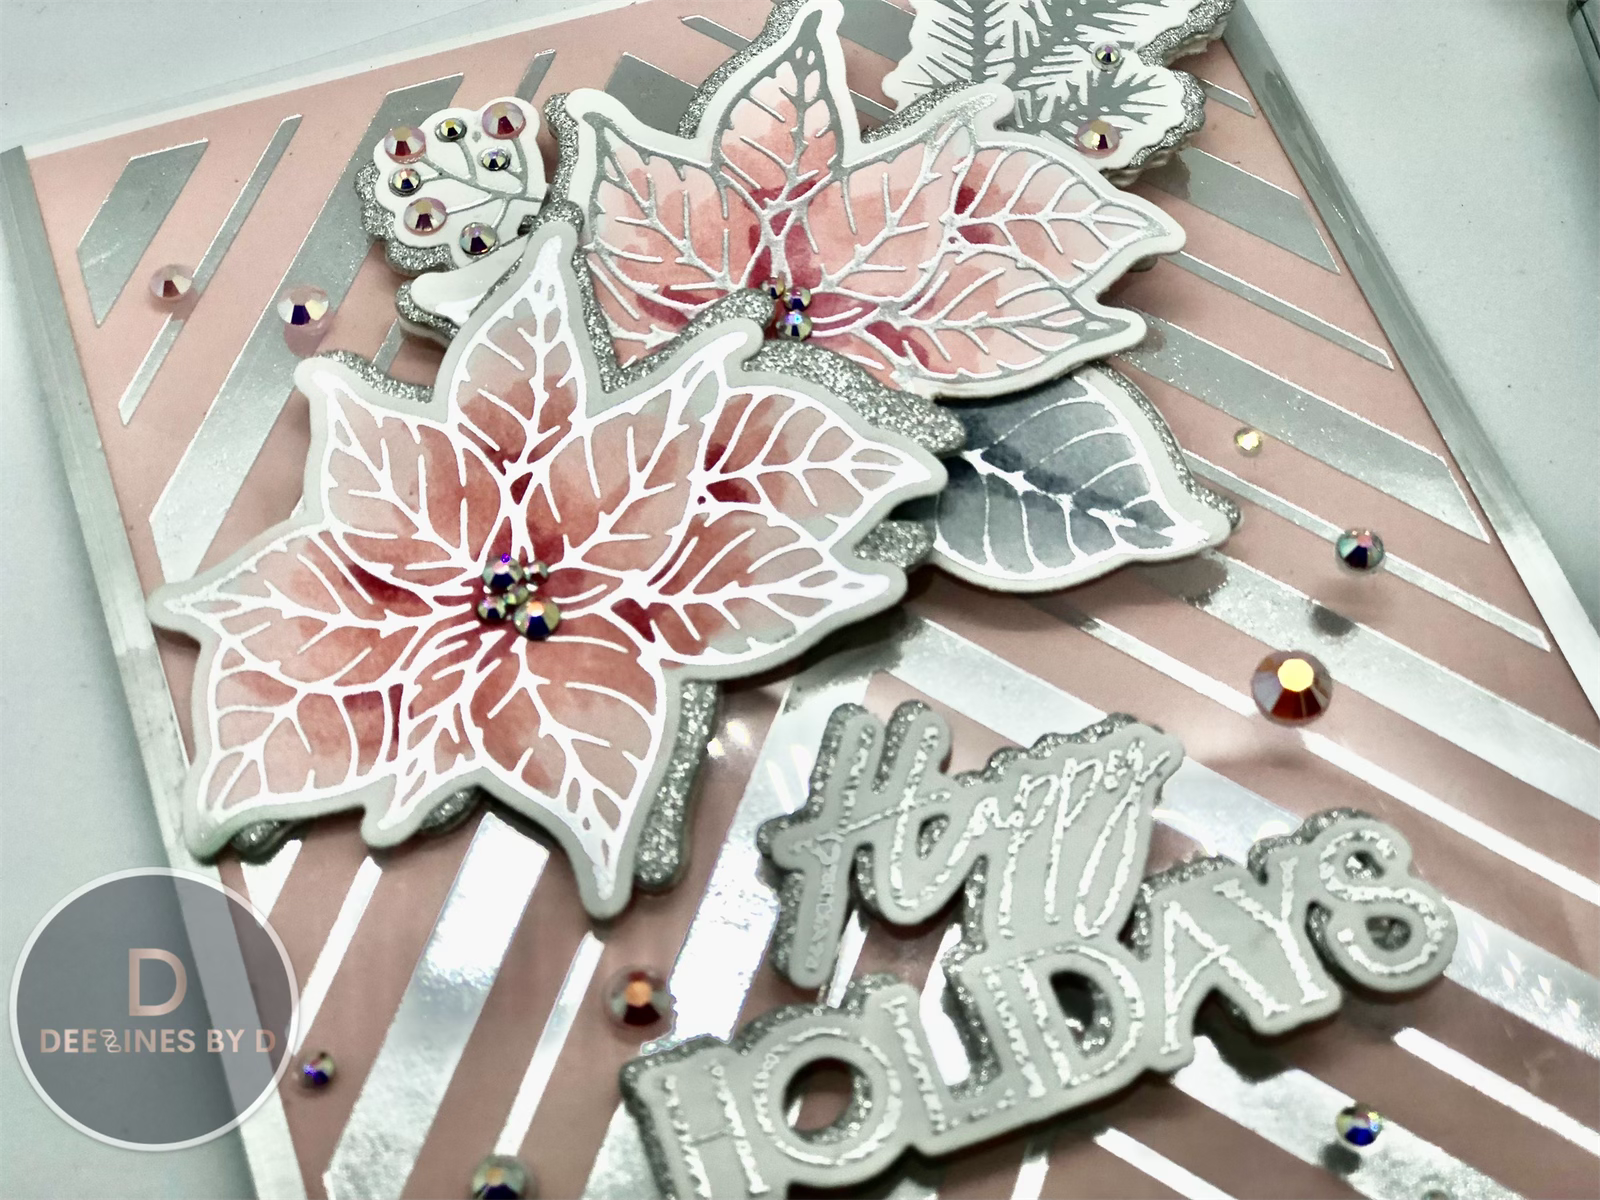
This week's Make The Cards Challenge 43 is a theme challenge and what better theme than Christmas! I've been loving soft colours this year so my card today features a soft pink look with lots of silver and shine! This card is a little different in that I've used a double fold design using acetate! This look is so beautiful and creates an elegant Christmas card that will "wow" friends and family! And I'll show you exactly how to do just that!

Challenge Post

Watch the Video on YouTube

Like what you're seeing? Pin this picture for later on Pinterest!
The first thing I did was foil my Pinkfresh Studio Chevron background onto some light pink cardstock using Spellbinders Silver Foil and my Glimmer System. I actually foiled this on pink and white cardstock to give me some options when putting this together. I often do this in case I change my mind during the creative process. I also foiled the Spellbinders Holiday Florals Plates on white cardstock with the same foil and cut them out with the coordinating dies. I did 3 poinsettias and 2 of the other foliage pieces for this card. I then used my Spectrum Noir Markers to colour in the poinsettias and leaves only since the other foliage do not really need to be coloured. I find that putting the die-cuts back into the negative space to colour helps me or you could just colour first and then cut out the images. For the poinsettia I used the Spectrum Noir Pale Pink Blend and for the leaves the Spectrum Noir Ice Grey Blend. I also made sure to make the colouring very soft and light, using more of the medium and light colours. I love using the Triblends because they come in 3 shades and it just makes picking colours that much simpler! Not to mention, for each marker you basically get 3 markers in one!

Next I die cut some extra pieces of each foliage piece out of white cardstock (3 each) and Sizzix Opulent Silver Glitter cardstock (1 each). I used these to add layers to the coloured pieces and placed the glitter cardstock piece in an offset manner to create a shadow. So for each piece I stacked 2 white cardstock pieces, 1 glitter offset and the coloured piece. This leaves one piece which I will use later to cover up the glue showing on the other side of the acetate panel.
I also cut out the "Happy Holidays" sentiment from the Pinkfresh Studio Happy Holidays Circle Frame Stamps & Dies set. I cut this out of white cardstock 4 times and once from the Sizzix Opulent Silver Glitter cardstock. I heat embossed the sentiment stamp with Ranger Silver Embossing Powder on one piece and stacked and adhered them together in the same manner as the other pieces with BearlyArt Glue.
With all my die cut pieces put together, I started working on the card base. I made an A2-sized center folded card base that would allow a 1/8" border around the foiled chevron background when placed on the card front. I did not measure this but made it to fit the background so I don't have any numbers for this. The general idea is in the figure below. I also cut a piece of acetate about 4.25" x 5.5" with a 1/4" flap ( so 4.5" x 5.5"). Once I folded the flap on the acetate (you will need your bone folder for this), I added some strong double sized adhesive (Scor-Pal).

Before adding anything else to the card base, I decorated the inside as this may be harder to do once the acetate is added. I used the extra die cuts of the foliage and poinsettia to decorate the bottom left of the card. I then stamped out the main sentiment from the Altenew Blessings stamp set in VersaFine Clair Nocturn ink. I also stamped the "Merry Christmas" sentiment from the Altenew BAF Poinsettia stamp set in Kitsch Flamingo Distress Oxide ink.


Next, I adhered the chevron pink panel to the front of the white card base. Now is when I lined up the acetate on the card front and adhered the flap to the back of the cardstock (more easily demonstrated in the YouTube video linked above). I arranged and adhered the "Happy Holidays" sentiment and foliage pieces with Scor-Pal tape also. I chose this adhesive as it requires no drying time and will adhere strongly to the acetate. Once everything was adhered where I wanted it, I turned over the acetate piece and adhered the blank white extra die cut pieces to cover the adhesive showing through from the front. This just gives it a cleaner look and covers up that unsightly adhesive.
Finally, I finished off the front with some Pinkfresh Studio Ballet Slipper Jewels & Crystal AB LolliBeads. I used these gems around the background and for the centers of the poinsettias and berry branches. I find this adds more interest!
And that's my card for this week's challenge. I hope that you have been inspired!
Furthermore, I encourage you to check out the rest of the designer's inspiration and create your own card to link up to the challenge page for a chance to be this week's winner.
As always, thanks for stopping by. And don't forget to leave me a comment, as I love hearing from you!

I will be entering this card in the Simon Says Stamp Wednesday Challenge which is an Anything Goes challenge this week!
Supplies
(note: Any products not included here are linked within the blog text)

- Tsukineko - VersaFine Clair - Ink Pad - Nocturne

- Price: $8.57
- Pinkfresh Studio - Jewels - Ballet Slipper

- Price: $4.05


- Scor-Pal - Scor-Tape 1/4" x 27 yds

- Price: $4.49
- Scor-Pal - Scor-Tape 1/8" x 27 yds

- Price: $3.59

- Bearly Art - Precision Craft Glue - The Original

- Price: $14.99

- Tombow - Mono Adhesive Dots - Dispenser

- Price: $5.79


- Pinkfresh Studio - Hot Foil Plate - Chevron

- Price: $22.79
- Spellbinders - Glimmer Hot Foil System, NEW

- Price: $99.99


- Ranger Ink - Basics Embossing Powder - Silver

- Price: $4.74


This is stunning!!! Clever fold design! Love it!
ReplyDeleteVery pretty, your cards keep telling me I need to try foiling!
ReplyDeleteI love how different the colors are and just beautiful!
ReplyDelete