Ink Spray Backgrounds & Foiling on Acetate | Make The Cards Challenge 44
Hello and Happy Wednesday!
This week's Make The Cards Challenge 44 is another theme challenge and this one is Winter! Ranger has a whole line of Tim Holtz ink sprays and I only just recently bought some stains and Mica Sprays! They are so fun to use to make quick backgrounds and I'll be using them to create two winter backgrounds for today's cards!

Challenge Post

Watch the Video on YouTube

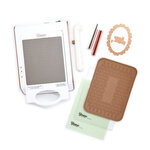
Like what you're seeing? Pin this picture for later on Pinterest!
Ink Spray Backgrounds:
The best way to keep your desk space clean when using ink sprays is to have a spare box or shoe box - any box will work. It just helps contain the ink splatter and makes for an easy clean up. I cut a full piece of white cardstock (8.5" x 11") in half and used my ink sprays to add ink to both of them. I made one panel darker than the other for 2 different looks. I noticed if I pressed hard on the spray, I got big misty sprays that cover more area and if I pressed slightly on the spray, I got nice large droplets. I used both of these methods to create some variation in my background and to help create more of a snowy scene. Once I added enough colour, I used my white acrylic paint with some water and a paint brush to add some splatter to the panels to give the illusion of snow. The ink sprays I used for each panel are as follows:
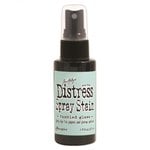
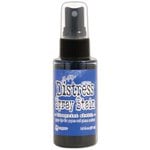
Dark Panel - Prize Ribbon, Chipped Sapphire, Villainous Potion, Brushed Pewter
Light Panel - Tumbled Glass, Salvaged Patina, Broken China, Brushed Pewter
I let these panels dry over night and in the meantime I did some foiling and a bunch of die-cutting.
Foiling on Acetate:
- Make sure you have some HEAT RESISTANT acetate. This is important as you don't want your acetate to melt on your foil machine. I used Grafix Dura-Lar acetate from Amazon.
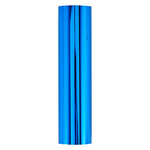
- Use the Spellbinders Glimmer Essentials plates to foil 2 sentiments on some acetate using Spellbinders Prism and Cobalt Blue foil.
- I placed the plate+foil+acetate on the heated surface and let the timer run out before adding the space shim and cutting plate. I found this maintained the look of my acetate and prevented any warping or adverse results.
- Use the stitched circle from the Spellbinders Triple Tear Dies to cut out the acetate. I recommend placing a scrap piece of paper on the top and bottom of the acetate while cutting, especially if your plates are heavily used. This prevents your acetate from getting any scuff marks from your acrylic plates. If you're using new plates, you can skip the paper.

Die-cutting:
- I used this village die set from Amazon and cut out all of the buildings twice from white cardstock and Sizzix Silver Mirror cardstock. I then adhered them together using Artist-tac adhesive in an offset manner to create a shadow with the silver.
- I used the Sizzix Tim Holtz Snowflake Die set to cut out some snowflakes from Sizzix silver mirror cardstock and shimmer vellum.
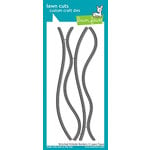
- Used the Lawnfawn Stitched Hillside Borders to cut out 4 pieces of Sizzix Ivory Glitter cardstock. These pieces will be my snowy hills.
Assembly:
- I cut both backgrounds down to size (6.75" x 4.75") and adhered the snowy hills. I attached one directly to the background and the other with foam squares to create dimension. This creates a background and foreground for the village scene, making it look more dimensional.
- I added the acetate sentiment circle using 2 small pieces of foam square that I strategically placed near the outer edge of the circle - I'll explain why in a second.
- I adhered the buildings, some with tape runner and some with foam squares, and I added some small snow mounds which I also cut from the village set of dies.
- I then attached the snowflakes in layers, particularly on top of those foam squares showing through the acetate piece. This covers of the foam and adds to the snowy wintery scene.
-Finally, I embellished the front with some Crystal AB LolliBead Gems using my Bearly Art Glue.


Card Inside:
- I cut two 5" x 7" center-folded card bases. I set these up in my Tonic Studios Tim Holtz stamp positioner (I find this stamp positioner ideal for doing my card insides because it is bigger and my card can hang off the edge of the platform if need be. I only need this because I make bigger cards, but the MISTI would work fine for an A2 sized card.
- I arranged the snowflakes on the left side of the card inside from the Avery Elle Snowflakes & Simon Says Stamp Joy For You stamp sets. And I stamped them out with Salvaged Patina and Tumbled Glass Oxide inks for the light card and Broken China & Chipped Sapphire Oxide Inks for the dark card.
- While this completely dries, I stamped out the sentiment from the Altenew Blessings stamp set in VersaFine Clair Nocturne ink and a sub-sentiment from the Simon Says Stamp Joy For You set in Salvaged Patina and Broken China oxide inks.
- Then I rearranged those snowflake stamps on the left side of my card inside to overlap the already stamped snowflakes. I heat embossed these with Ranger Holographic Embossing Powder to create a glittery snowflake look and to create more dimension inside my card.
Last but not least, I attached the card fronts to the card bases and my cards were done! I hope that you have been inspired!
Furthermore, I encourage you to check out the rest of the designer's inspiration and create your own card to link up to the challenge page for a chance to be this week's winner.
As always, thanks for stopping by. And don't forget to leave me a comment, as I love hearing from you!

Supplies
(note: Any products not included here are linked within the blog text)
- Embossing Powder Holographic, 1oz Jar

- Price: $4.99

- Tsukineko - VersaMark Watermark - Stamp Pad

- Price: $7.39


- Dina Wakley Media Acrylic Paint White, 1oz

- Price: $2.99
- Versafine Clair Ink-Nocturne

- Price: $7.99


- Spellbinders - Glimmer Hot Foil System
- Price: $105.48


OMG ... these are just GORGEOUS! LOVE the snowflakes on the inside of the front cover too ... what an awesome idea (thanks). Fabulous inspiration ... beautifully done my friend!
ReplyDeleteThank you so much Darlene! I’m glad you like them! 🙂
DeleteI loved everything about your card with the houses and would like to attempt a similar one. I saw your link to Amazon and got confused when I saw the word Russia. Did these dies come from Russia and if so, did it take a long time. I like the look of these and saw similar ones on aliexpress but I liked yours better.
ReplyDeleteThese cards are gorgeous! I love how you used the cloud die for snowbanks. So clever!! Decorating the inside is just perfection! Beautiful!!!
ReplyDelete