Inspired By A Colour Scheme | Christmas Cards
Hello and I hope you are having a great weekend!
Having trouble finding inspiration for your Christmas cards this year? I tend to find inspiration in magazines, commercials, Facebook groups, Pinterest and Instagram. And it always seems so hard not to just re-create the beauties you see. So I find the easiest way to get inspired is by colour schemes! I saw a non-traditional colour scheme lately and I'm in love with it! I want to show you a couple cards today using this colour scheme and I hope you will be inspired to do the same!

Watch the Video on YouTube

I started out by making my own coloured cardstock in the colour scheme that I liked. I used my Altenew Ink Pads to apply ink to some white cardstock in 5 colours and let them dry completely. The colours I used were Dew Drops, Pumpkin Pie, Rouge, Blush and Frosty Red.

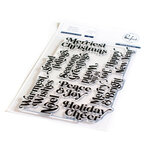
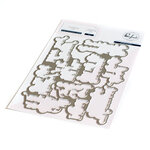
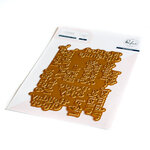
For the first card, I decided to do a lot of die-cutting. I used the Simon Says Stamp Eliza Die to cut out some 1 snowflake each from these coloured cardstocks and some extras from some plain white cardstock. I also cut a few out of some Sizzix Opulent White Glitter cardstock. This die cuts out some small confetti circles - I held on to those for embellishments! I stacked a few snowflakes together and adhered them in the centers only to create 3 stacked snowflakes. By adhering only n the centers, the end stick up and create dimension. I created a white on white background on a slimline panel (3 - 3/4" x 8-1/2") of white cardstock by adhering some white snowflakes with some Artist-tac adhesive. And then I arranged my 3 snowflake stacks and glued them onto my panel with BearlyArt Glue. I keep a stash of pre-foiled and cut sentiments that I made with the Pinkfresh Studio Holiday Sentiments plate and die. I chose to use the "Merry & Bright" sentiment foiled in Spellbinders Rose Gold foil. And I also used the die very carefully (as it is a one piece die for many sentiments) to cut out this sentiment from white and the rouge-coloured cardstock. I stacked the white, rouge and foiled sentiment in an offset fashion and adhered them to the card panel as well. To finish off the panel, I glued down those confetti pieces from the die cuts and added some clear white LolliBead Gems.

For the second card, I used these ink colours to do some stamping. I started with some light ink blending around the four edges of a (4-4/3" x 6-3/4") A7-sized piece of white cardstock with the Blush and Rouge inks. I made sure this panel was a little bit smaller so I would get a 1/8" border when I put this on my card base. I used the Honey Bee Stamps Farmhouse Tree Builder stamp set to stamp out the layered tree in Altenew Frosty Red, Rouge and Encore Metallic Silver inks. Then I used another sentiment from my stash (made with the same Pinkfresh products listed above) that had been foiled with some Spellbinders Black foil. I attached this with some foam squares and then used some Pinkfresh Studio Jewels in Sky Blue and Peach Fuzz to decorate the tree. I actually got a little embellishment happy and added some more jewels around the edge of the card too. This was a huge lesson that sometimes less is more. I did not like how it looked so I decide to try and fix it. And I did this by cutting out some pine branches from white cardstock using the Sunny Studios Christmas Trimmings stamp and die set. Once cut, I used the negative piece of my cardstock with some washi tape in my MISTI to line up my die-cut with my stamp and stamped out the pine branches in Altenew Aqualicious and Dew Drops ink. I stamped the Aqualicious first which is darker and then slightly off set the stamp to stamp the Dew Drops. This creates a little shadow which is subtle but makes a world of difference in creating a softer look (this is demonstrated in my YouTube video linked above). Then I took all of these branches and arranged them around the border of my card panel, adhering them with some foam squares for dimension. I ended up covering some embellishments, you could take them off and save them. This fixed the problem entirely and I finished off the branches with a touch of Nuvo Aqua Shimmer Marker.


For the card insides, I did some stamping of snowflakes from the Avery Elle Snowflakes stamp set using the colour scheme listed in the beginning on the first card. I stamped these out in the various colours on the bottom left and top right corners of the card inside. And I added some of those left over confetti circles too. For the second card, I did some more light ink blending on the bottom left and top right corners with the Blush and Rouge ink. I also stamped out the pine branches with the Aqualicious and Dew Drop inks much like the front of the card. For the sentiment, I used the Altenew Blessings stamp set and stamped the main sentiment in VersaFine Clair Nocturn ink on both card insides. For the slimline card, I stamped the "Merry Christmas" sentiment from the Sunny Studios Christmas Trimmings set in Altenew Pumpkin Pie. And for the A7-sized card, I stamped out the "Merry Christmas" from the Altenew BAF Poinsettia set in Altenew Rouge ink. And to finish of the second card, I also added some Diamond Stickles as berries to the pine branches.
And there you have my two cards inspired by colour schemes! You can see how they both have a different look and the colours that I like have been used in two different ways. I would love to know which card is your favourite!
As always, thanks for stopping by. And don't forget to leave me a comment, as I love hearing from you!

Supplies
(note: Any products not included here are linked within the blog text)
- Tsukineko - VersaFine Clair - Ink Pad - Nocturne

- Price: $8.57
- Bearly Art - Precision Craft Glue - The Original

- Price: $14.99

- Scor-Pal - Scor-Tape 1/8" x 27 yds

- Price: $3.59

- Tombow - Mono Adhesive Dots - Dispenser

- Price: $5.79


- Nuvo - Aqua Shimmer Pens - Opal Quartz

- Price: $3.99
- Lisa Horton Crafts - Ink Blending Wonder Brushes

- Price: $27.10


- Spellbinders - Glimmer Hot Foil System, NEW

- Price: $99.99
- Journey Gold Ink Pad

- Price: $14.95
- Journey Silver Ink Pad

- Price: $14.95
- Ranger Ink - Stickles Glitter Glue - Diamond

- Price: $2.19


Comments
Post a Comment
Please leave me a comment as I always love hearing from you! 😃