Using Foil Plates to Dry Emboss | Make The Cards Challenge 40
Hello Friends!
This week's Make The Cards Challenge 40 is another colour challenge and we're featuring the colour orange! This just puts me in the mood for pumpkins and although Thanksgiving is over in Canada, I know my American friends have this holiday coming up! I just got my Spellbinders October 2021 Glimmer Kit of the Month and thought it would be perfect to use for a thankful orange-accented card.
When I think of foil plates, I think of all the beautiful shiny foiled images you can make, but I always tend to forget that you can use these plates for dry embossed looks as well. With embossing folders being all the buzz lately, I thought I would extend the use of my foil plates to get the same embossed look!

Challenge Post

Watch the Video on YouTube

I started with a 5-1/4" x 4" piece of white cardstock, which will give me a 1/8" border around my A2 sized card. I took the 4 main glimmer plates from the Spellbinders Glimmering Autumn Woods Set (GOM Oct '21) and arranged them in a corner on my cardstock. (Please note that this set is not available for individual purchase yet, but I think it will be available soon on the Spellbinders site under Past Club Kits.)I used some washi tape to tape them together to make one large plate; this way I could emboss one area and move the 4 plates together around the panel to emboss the panel fully. This method just saves me some time. In the end, I detached the plates to emboss the leftover areas separately. I used my Sizzix BigShot Plus to do the dry embossing and the sandwich that you use, will depend on your cardstock, machine and plates. I found that the following sandwich worked well for me: platform, adapter B, silicone rubber pad, cardstock, plates, impressions pad (to get a better idea, just click on the YouTube video link where I show you this process). I realize that you could make this sandwich differently with the same results, but I like placing my plates face down instead of face up and this is why I use my plates this way. You can always fiddle around with the order and do what works for you!
Next, I foiled the 4 images using the Spellbinders Copper foil that came with the kit. I figured that copper shines orange and so this fits the colour theme here. After foiling, I used my Copic Ciao markers (Set A) to colour in these images using some simple copic colouring methods. The colours I used were as follows:
Toadstool - E21, YR02, R29, R27, 0, C7, C3, C1
Oak Leaf - YR04, YR07, R02
Maple Leaf - YR04, YR07, R02, Y00, Y08
Acorn - E47, E37, E35, E33, E21
I then used the coordinating dies that also come with the set to cut these images out. Now these dies are a bit different in that they do not leave a white border around your images once cut. They cut right up to the edge of the foiled image. I also foiled the sentiment with the same foil on black cardstock and cut out the strip using the small sentiment strip die from the Spellbinders Sweet & Snarky Birthday Wishes (GOM June '21) set.

I arranged the acorn, toadstool and maple leaf in the center of the embossed panel and adhered them with some foam squares cut to size. I added the sentiment strip just below the images to create a center focal point. I usually make more labour intensive cards, but I decided to keep this one simple. Sometimes, a simple look is all you need! To add a bit more orange to this design, I matted this panel on a piece of orange cardstock to create a small border.
Before attaching the panel to the card base, I decided to design my card inside. Since this is an A2-sized card, it is considerably smaller than my usual A7 sized cards. So I will keep the inside simple as well. I used the extra oak leaf and the little sprig that that you can cut from the dies from the same glimmer set, to dress up the inside a bit. I attached these to the bottom left of this top-folding card. I also used the Pinkfresh Studio Heartfelt Thanks stamp set to stamp out the "Heartfelt Thanks" sentiment with VersaFine Clair Nocturne Ink. And with that, my inside was complete. I attached the card front to the card base with some Simon Says Stamp Tape Runner and embellished the front with some Pinkfresh Studio Peach Fuzz Jewels.

And there you have my super simple orange-themed card using foil plates for a dry embossed background! So always remember that you can stretch the use of your crafty stash by using this dry emboss technique!
I encourage you to check out the rest of the designer's inspiration and create your own card to link up to the challenge page for a chance to be this week's winner.
As always, thanks for stopping by. And don't forget to leave me a comment, as I love hearing from you!

Supplies
(note: Any products not included here are linked within the blog text)
- Sizzix - Texturz - Silicone Rubber

- Price: $8.54
- Copic - Ciao Marker - Cool Gray - C1

- Price: $3.90
- Copic - Ciao Marker - Cool Gray - C3

- Price: $3.90
- Copic - Ciao Marker - Cool Gray - C7

- Price: $3.90
- Copic - Ciao Marker - Soft Sun - E21

- Price: $3.90
- Copic - Ciao Marker - Sand - E33

- Price: $3.90
- Copic - Ciao Marker - Chamois - E35

- Price: $3.90
- Copic - Ciao Marker - Sepia - E37

- Price: $3.90
- Copic - Ciao Marker - Dark Brown - E47

- Price: $3.90
- Copic - Ciao Marker - Rose Salmon - R02

- Price: $3.90
- Copic - Ciao Marker - Cadmium Red - R27

- Price: $3.90
- Copic - Ciao Marker - Lipstick Red - R29

- Price: $3.90
- Copic - Ciao Marker - Pale Lemon - Y000

- Price: $3.90
- Copic - Ciao Marker - Acid Yellow - Y08

- Price: $3.90
- Copic - Ciao Marker - Light Orange - YR02

- Price: $3.90
- Copic - Ciao Marker - Chrome Orange - YR04

- Price: $3.90
- Copic - Ciao Marker - Cadmium Orange - YR07

- Price: $3.90

- Tsukineko - VersaFine Clair - Ink Pad - Nocturne

- Price: $7.91
- Bearly Art - Precision Craft Glue - The Original

- Price: $14.99
- Sizzix - Sidekick - Starter Kit - White and Gray
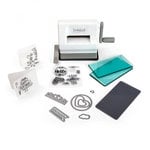
- Price: $40.59
- Pinkfresh Studio - Jewels - Peach Fuzz

- Price: $4.05

- Spellbinders - Glimmer Hot Foil System
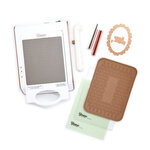
- Price: $107.88
- Sizzix - Texturz - Impressions Pad

- Price: $8.54


OH WOW this is GORGEOUS! Beautiful creation teamie!!
ReplyDeleteAw thanks Darlene! You’re always so great at supporting all of us! 😀
DeleteGorgeous card, love the gold accents.
ReplyDeleteThank you Allisa!
Delete