A Slimline Classic Christmas | Make The Cards Challenge 45
Hello Crafter's...it's that time again!
This week's Make The Cards Challenge 45 is a colour challenge featuring "A Classic Christmas". We're using classic reds and greens and I'm choosing to feature the Spellbinders November 2021 Small Die, Large Die and Glimmer kit of the month. I used these gorgeous border dies to create a vertical slimline card. I love how you can layer these borders in different ways to get unique looks!

Challenge Post

Watch the Video on YouTube

Like what you're seeing? Pin this picture for later on Pinterest!
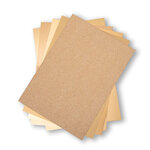
Although this card may look a bit complicated, it was actually really simple to put together. First, I chose my dark and light reds and greens and cut them to the desired width of my card, 3.75". I just took a 8.5" x 11" piece of each cardstock and cut it to that width. The length doesn't have to be any specific size since we will be cutting layers out of this. (About 4-6" is good) I also cut 2 pieces of Sizzix Opulent Ivory Glitter and Gold Mirror cardstock.
I then lined up my border on the first piece of cardstock, the light red and die cut the border. I used the wavy line border and once cut I used this piece of cardstock to line up the next border with the next piece of cardstock. You have to use the initial cut as a guide to get the same part of the wave, so that when you put this together all of the layers will line up. (I recommend watching the YouTube video linked above for this as it will help you visualize this process better.) I used the wavy line, scallop, detail window and foliage borders for this card from the Spellbinders LDOM Nov 2021 set.
Once all of my layers were cut, I aligned and adhered them together with a mix of Tombow tape runner and BearlyArt Glue. And I attached each layered border to the dark green piece of cardstock that I cut with foam squares, like in the pictures of the card. I also die cut some extra pine branches, poinsettias, berries and hollies with the extra dies provided in the set.
I used the some gold glitter puffy stickers which come with the Spellbinders All Aboard Card Kit (which is still available in the shop on sale!!😁 - linked on my left side bar and below). I adhered these stickers to the card front to spell out "joy" as my sentiment. I then arranged and adhered the extra die-cut pieces around the foliage border and attached a few poinsettias in the bottom right and top left for interest. I chose to place white glitter poinsettias offset from the red in the poinsettia flower to highlight the poinsettia and make it stand out more. I then embellished the panel with Nail Art Gems in red and AB clear and I used these great glitter gems from the Spellbinders All Aboard kit again. That's why I love these kits, even if you like just a few items, they really make the kit worth it. I usually add up the price of items that I like and then justify buying the whole thing that way. In this case, I don't even think these are available separately and they are gorgeous!


For the card inside, I used the Spellbinders SDOM and cut out 2 ornaments. I cut the background (open die) from Sizzix Gold Mirror cardstock and I cut the intricate top layer from the dark red cardstock. I also cut the string and ornament topper dies from Sizzix Ivory Glitter cardstock. I assembled and adhered the ornaments to the top left of the card inside. This card base ended up being 8.5" x 3.75". I also took 2 scraps from the pieces I cut for the front and adhered them to the bottom right of the card inside. This time the waves were offset which also creates a great look!
For the sentiment, I used my favourite set for Christmas Inside greetings, the Altenew Blessings stamp set. I stamped the main sentiment in VersaFine Clair Nocturne ink. I also stamped a "Merry Christmas" sub-sentiment from the Altenew Holiday Wishes set in Altenew Mountain Pine ink.

Finally, I adhered the card front to the card base and I added some Studio Katia Gold Foil Confetti to the card inside. And there you have my Slimline Classic Christmas card!
I hope that you have been inspired!
I encourage you to check out the rest of the designer's inspiration and create your own card to link up to the challenge page for a chance to be this week's winner.
As always, thanks for stopping by. And don't forget to leave me a comment, as I love hearing from you!

Supplies
(note: Any products not included here are linked within the blog text)

from: Spellbinders

from: Spellbinders
- Scor-Pal - Scor-Tape 1/8" x 27 yds

- Price: $3.59
- Altenew - Clear Photopolymer Stamps - Holiday Wishes

- Price: $20.47
- Mountain Pine Crisp Dye Ink
- Price: $7.00
- Tsukineko - VersaFine Clair - Ink Pad - Nocturne

- Price: $8.57

- Sizzix - Big Shot Plus - Starter Kit - White and Gray

- Price: $201.59
- Bearly Art - Precision Craft Glue - The Original

- Price: $14.99
- Tombow - Mono Adhesive Dots - Dispenser

- Price: $5.79
- Sizzix - Sidekick - Starter Kit - White and Gray
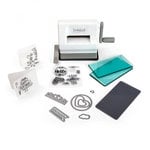
- Price: $40.59


Gorgeous card, love the great details!
ReplyDeleteThank you Alissa!
Delete