Christmas Acetate Easel Card
Hello Crafters and Welcome back!
So it's the last weekend before Christmas and I'm posting one of my last Christmas cards for the year! I was really inspired by @Aveereneecarddesigns (you can find her on Instagram) because she has been making a ton of easel cards and her designs are truly unique and inspiring! So I took out my acetate, PinkFresh and Spellbinders products, and with Avee's inspiration, I put together this simple yet gorgeous Holiday card!

Watch the Video on YouTube

For this card, I took one of my white cardstock scraps large enough for this stencil and stamp. I chose to use the PinkFresh Studio Happy Holidays Circle Frame stamps, stencil and dies. I used my MISTI to stamp out the circle frame with VersaFine Clair Nocturne ink. Then I lined up my stencils and added colour in the following order"
Stencil 1 - Open Leaf - Altenew Persian Blue Ink
Stencil 2 - Leaf Detail - Altenew Sapphire Ink
Stencil 3 - Berries - Altenew Heart Beat Ink
Once complete, I die cut this frame out with the coordinating die along with 7 other frames from plain white cardstock. I'll use these layers to build up this die and create a thick die cut - it will end up looking like a thick chipboard piece. I also heat embossed one of the sentiments from the set with Simon Says Stamp Ultra Fine Steel Navy embossing powder. Then, I die cut this sentiment and 7 more layers out of white cardstock.
I used the Spellbinders Christmas Foliage Strip & Border dies (LDOM Nov 21') to die cut some pine branches, holly leaves and poinsettias out of Tim Holtz Blue Jewel Craft-stock and Sizzix Opulent Silver cardstocks. I kept these aside to add to my card once assembled.
For the card base, I cut an A2 Sized top folding card out of heavy white cardstock. I then scored a line 2.75" up from the bottom of the card front. This creates the card easel. I also cut a 4.25" x 5.5" piece of acetate. I tried to use the thickest acetate I have as it will need to stand up in the easel position. If you do not have a sturdy acetate, just make sure you build up your die cut frame with 6-7 layers of cardstock to create that sturdiness.


Next, I adhered 5 layers of the cardstock frame together with my BearlyArts Glue and put the stenciled frame on top. I did the same with the sentiment. I adhered both pieces to the acetate with strong double sided adhesive (Scor-Pal tape). Before doing anything else, I decorated my card inside. I stamped a sentiment from the Altenew Holiday Wishes stamp set in VersaFine Clair Nocturne ink and Altenew Persian Blue ink.
Then I adhered the bottom half of the acetate card front to the bottom section of the card base with 3M foam tape for added dimension. I used the extra white die cut frame and sentiment pieces to attach behind the acetate to cover up any adhesive showing through. You don't really have to do this but I like to do it to make sure the card is completely clean and neat.
If you wanted to keep your card simple you could just skip to the next step and be done. But I wanted to add a bit more interest to my card front so I added those die cut poinsettias, hollies and pine branches just around the circle frame on the card front. I propped up the poinsettias with foam squares and adhered the rest right onto the card. I also made sure to put a matching poinsettia on the inside of the card just the the bottom. This is required in order for the easel card to stand upright. The bottom fold of the card needs to rest against this to stand up.
Finally, I finished off this card with some AB & Red Nail Art Gems around the background and for the poinsettia centers.
And there you have my Christmas Acetate Easel Card!


- Tsukineko - VersaFine Clair - Ink Pad - Nocturne

- Price: $8.57
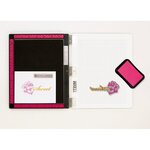
- Altenew - Clear Photopolymer Stamps - Holiday Wishes

- Price: $20.47

- Scor-Pal - Scor-Tape 1/8" x 27 yds

- Price: $3.59
- Sizzix - Sidekick - Starter Kit - White and Gray
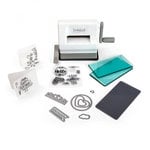
- Price: $40.59
- Gina K Designs - Foam Tape - White - 0.375 Inch
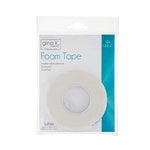
- Price: $5.99
- Bearly Art - Precision Craft Glue - The Original

- Price: $14.99


- Lisa Horton Crafts - Ink Blending Wonder Brushes

- Price: $27.10


Absolutely gorgeous card!! I love the whole design of this, so very pretty! 💙
ReplyDeleteCongratulations you have won the $25 voucher on the Simon Says Stamp Monday Challenge.
Please email us.
simonsayschallenge@hotmail.com
luv
Lols x x x
Thank you Lorraine! I already got some great goodies with that voucher! 💖
Delete