Christmas Tags Part 1 | Weekend of Tags - Mini Series
Hello friends!
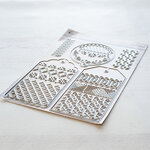
Today's post features many different tags! I've made so many cards that I need some tags to match and some just for fun! I will be using the PinkFresh Studio Classic Tag dies which work perfectly for this! And if you couldn't get your hands on the new shaker tags, I'll show you how to make them with this older set! I also added some die cuts, glitter and ephemera from various brands. I always think it's fun to mix and match your sets and brands to create unique creations!
So this post is one of two in a little tag mini series that I'm sharing with you this weekend. I also have YouTube video tutorials to match linked below 👇!
Watch the Video on YouTube
I used some pattern paper from the Kaisercraft Peppermint Kisses paper pad and cut it using the bottom half of this tag die. I adhered it to the front of the back tag. I then adhered the front tag on top which allows that pattern paper to show through the die cut design.
Tag 3
For the third tag, I attached the front tag to the back tag piece with nothing in between to make this a bit simpler.
I cut out 2 pieces, one from Sizzix Opulent Gold Mirror cardstock and one from white and gold striped pattern paper, using the Simon Says Stamp Simple Stem die. I assembled another bow from some Red mirror cardstock and then adhered this to the tag front, along with another sentiment from my stash.
I finished this tag off with some more red glitter gems from the Spellbinders All Aboard kit. And again, I added some small clear sticker gems which are from the Dollar Store. I added some red shiny jewelry string for the top of the tag.
And that's how I put these 3 tags together! It was a fun process and rewarding once you see how they turn out! Not to mention, using up leftover die cuts is like the icing on the cake!
And with that, I hope you have been inspired. As always, thanks for stopping by. And don't forget to leave me a comment, as I love hearing from you! Additionally tune in for tomorrow's post where I'll share some more of these pretty tags!
- Versafine Clair Ink-Nocturne

- Price: $7.99
- Versafine Clair Ink-Tulip Red

- Price: $7.99
- Sizzix - Big Shot Plus - Starter Kit - White and Gray

- Price: $201.59
- Tsukineko - VersaMark Watermark - Stamp Pad

- Price: $7.39
- Bearly Art - Precision Craft Glue - The Original

- Price: $14.99
- Sizzix - Sidekick - Starter Kit - White and Gray
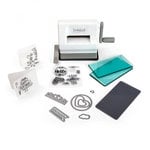
- Price: $40.59








Comments
Post a Comment
Please leave me a comment as I always love hearing from you! 😃