Christmas Tags Part 2 | Weekend of Tags - Mini Series
Hello friends and welcome back!
This is the second post in a little tag mini series that I'm sharing with you this weekend. I have some more pretty tags to share and today's post focuses more on the circle or ornament tags that you can make with the PinkFresh Studio Classic Tag dies. I also have YouTube video tutorials to match linked below 👇! So don't forget to check those out too!
Watch the Video on YouTube
INSTRUCTIONS:
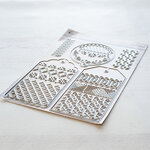
- Cut out desired tags from PinkFresh Studio Classic Tags die set. I cut out one with a decorative die for the front of the tag and one full tag for the back. And I did this for 1 standard sized tag and 3 ornament shaped tag designs for this post.
- Before putting together the fronts of the tags, I stamped out a small sentiment and a "To and From" box from Simon Says Stamp Joy For You & HO HO HO stamp sets for all 3 tags using VersaFine Clair Nocturne Ink and Pine Needles, Victorian Velvet and Kitsch Flamingo Oxide inks.
TIP: Get out all of your leftover die cut pieces from past projects and arrange them on your tags to get the most bang for your buck!
Tag 4
I stamped out a sub-sentiment on a white piece of cardstock and heat embossed it with Altenew Rose Gold Embossing Powder. This is from the SSS Joy For You stamp set. I cut it out using a sentiment die and adhered it with foam tape to the bottom of the tag front.
I added an acetate window to the back of the tag front and created a well with some foam tape. I added some clear gems to the well, added some extra foam tape to the rest of the tag front and adhered the back of the tag to make this a shaker tag! Wondering where I got those jewels from? They were actually on the inside of one of my old jewel pickers. Instead of just throwing it away, I took the jewels out and they double as embellishments for shaker cards since they are not flat-backed and are fully dimensional. I also found these inside the lanyard of a cell phone case I got from Amazon. Some cases have a lanyard that I never use and inside the netting of the lanyard are all these beautiful gems. I cut the lanyard, collect the gems and throw that netting away! It's such a great find, I had to share!
Then, I had some left over leaves that I had cut out using the PinkFresh Studio Curvy Leaves dies that I arranged on the front behind the sentiment. The main sentiment is from my stash of pre-foiled and cut sentiments that I made previously using the PinkFresh Studio Perfect Sentiments: Holiday foil plate and die. I attached this with foam squares.
I finished this tag with some PinkFresh Studio Ballet Slipper Gems and some small clear sticker gems which are from the Dollar Store. I added some gold shiny jewelry string for the top of the tag.
Tag 5
I finished this tag with some PinkFresh Studio Ballet Slipper Gems and some AB Crystal LolliBead gems. I added some gold shiny jewelry string for the top of the tag.
Tag 6
I finished this tag off with some peach and AB coloured nail art gems. I wanted to use these to show you that any nail art gems will work. I love that they come in smaller sizes for smaller tags and details like this! I added some silver shiny jewelry string for the top.
Tag 7
For this tag, I used some paper from American Crafts DCWV Holographic 6 x 6 paper stack to place in between the front and back of the tag and adhered them together. Again, I used some ephemera from an older Spellbinders Card Kit for the flowers and leaves.
I finished this tag off with some Trinity Stamps Boiled Sugar Embellishments. These are lovely because they look like dew drops on these flowers! You could always use some Nuvo Drops for this effect too. I added some silver shiny jewelry string for the top as well.
And these are my tags to share with you today! I hope I was able to show you how to make these tags with varying levels of skill and effort. The tags from yesterday and shaker tags in general will take a bit more time but you can always speed up the process by using ephemera like I did in the last two tags here! Also the ornament tags seemed to be the simplest to do. Either way, they were all fun!!
I hope you have been inspired. As always, thanks for stopping by. And don't forget to leave me a comment, as I love hearing from you! Please let me know if you liked this little mini series!
Challenge Entries for this post: Simon Says Stamp Wednesday Challenge - Happy Holidays/Christmas
Supplies
(note: Any products not included here are linked within the blog text)
- Mistletoe Messages dies

- Price: $20.00
- Pinkfresh Studio - Dies - Curvy Leaves

- Price: $14.40
- Tsukineko - VersaMark Watermark - Stamp Pad

- Price: $7.39
- Versafine Clair Ink-Nocturne

- Price: $7.99
- Bearly Art - Precision Craft Glue - The Original

- Price: $14.99
- Sizzix - Sidekick - Starter Kit - White and Gray
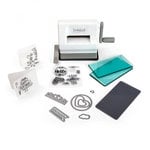
- Price: $40.59
- Sizzix - Big Shot Plus - Starter Kit - White and Gray

- Price: $201.59
- Gina K Designs - Foam Tape - White - 0.375 Inch
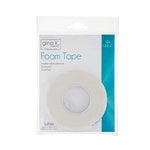
- Price: $5.99








Comments
Post a Comment
Please leave me a comment as I always love hearing from you! 😃