Using Unconventional Colours for Unique Cards
Happy Weekend Crafters!
Today I have a bit of an unconventional card to share with you. When people think of Valentine's Day, black flowers are normally out of the question - but I beg to differ! I used the HoneyBee Stamps Lovely Layers Rose dies to create this beautiful black and gold rose for this card. It turned out so nice that I had to share!


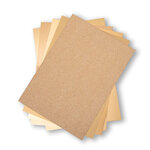
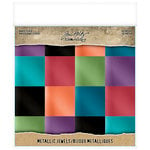
The first thing you need to do is pick out the cardstock you will be using. I chose to use Sizzix Opulent Gold Mirror and Glitter cardstock along with plain black and Tim Holtz Black Metallic Jewels cardstock.
1. Use HoneyBee Stamps Lovely Layers: Roses dies to cut out 7 layers of the rose and 4 layers of the bud as follows:
ROSE
Black Cardstock - Layer 1 (bottom layer)
Black Jewel Cardstock - Layer 2, 4, 6
Sizzix Gold Mirror Cardstock - Layer 3, 7 (top layer)
BUD
Layer 1 (stem) - Gold Glitter Cardstock
Layer 2 (bottom bud layer) - Gold Mirror Cardstock and Black Jewel
Layer 3 (Top Bud layer) - Black Jewel cardstock
Layer 4 (leaf at front of bud) - Gold Mirror Cardstock
2. Cut out the stem and leaves from Gold glitter and Gold mirror cardstock.
3. Assemble the Rose and stem using foam squares in between each layer for dimension.
4. Assemble the 4 layers of the bud. For the two die cut pieces of layer 2, adhere the black on top of the gold in a slight offset manner. I did this to create just a little more dimension in the bud.
5. Cut a 6.5" x 4.5" piece of red cardstock.
6. Arrange the stamps from the Altenew Baroque Motifs set on the red cardstock as desired and heat emboss with Ranger clear embossing powder.
7. Use Aged Mahogany and Black Soot Distress inks and a blending tool to do some ink blending around the border of the red cardstock, creating a darkened edge with the red and black inks.
8. Use the Spellbinders Calligraphy Hearts Plates to foil the "You Melt My Heart" sentiment in Spellbinders Red Foil. Cut this out with the sentiment die included in the set.


9. Use the PinkFresh Studio Lea's Ornate Letters die to cut the X and O two times from Gold mirror and plain black cardstock. Separate the outline pieces from the solid letter centers. Add small foam squares to the back of the gold letter outline so it hangs into the center and adhere the black solid letter piece in the middle. Do this for all 4 letters.
10. Cut a 5" x 7" side folding white card base. Mat the red background with Gold Glitter cardstock and then black glitter cardstock, creating 2 borders of 1/4" each. (black cardstock = 5" x 7", gold glitter cardstock = 4.75" x 6.75")
11. Adhere the rose, stem and bud onto the red cardstock with BearlyArt Glue. Adhere the XOXO with the foam squares already attached to the back. And glue the "You Melt My Heart" sentiment strip on top of the XOXO.
12. Embellish the front with Trinity Stamps Bubble Blower embellishments on the rose and background.
And there you have my unconventional black rose Valentine's card. I'm wiling to bet that this black rose would work for a masculine card as well. So look through your stash and pick some unconventional colours to use with your products. I think I'll try a blue metallic rose with this set next!
I hope you have been inspired and as always, thanks for stopping by. Please don't forget to leave me a comment, as I love hearing from you!


- Baroque Motifs Stamp Set
- Price: $24.00
- Tim Holtz Distress Ink Pads - Aged Mahogany

- Price: $6.15
- Tim Holtz Distress Ink Pads - Black Soot
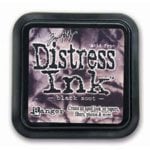
- Price: $6.15

- Scor-Pal - Scor-Tape 1/4" x 27 yds

- Price: $4.49
- Hero Arts - Ink Blending Brushes

- Price: $8.79
- Bearly Art - Precision Craft Glue - The Original

- Price: $14.99
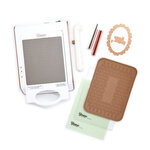
- Sizzix - Sidekick - Starter Kit - White and Gray

- Price: $40.59
- Tombow - Mono Adhesive Dots - Dispenser

- Price: $5.79
- Pinkfresh Studio - Dies - Lea's Ornate Lowercase

- Price: $38.68
- Spellbinders - Glimmer Hot Foil System
- Price: $105.48
- Ranger Ink - Basics Embossing Powder - Clear

- Price: $4.74


Comments
Post a Comment
Please leave me a comment as I always love hearing from you! 😃