Hello Crafters!
Welcome to the Scrap N' Stamp August Sunflower Inspiration Hop! Today I'm sharing some beautiful yellow and blue sunflower cards using products from Crafter's Companion. What better way to celebrate the last month of Summer then with Sunflowers!
GIVEAWAY ALERT!! Details here!👇
Scrap N' Stamp will be giving away a $50 Gift Certificate to one lucky commenter. So make sure to comment on my IG account @deezinesbyd to ensure you've been entered to win!😃
The giveaway closes August 24, 2022 at midnight EST. The winner will be chosen randomly and posted on the Scrap ‘N Stamp blog.
SALE ALERT!!
There is also a sale going on where you can save 20% on select floral themed items!
Check out the sale 👉-click here!
Card 1
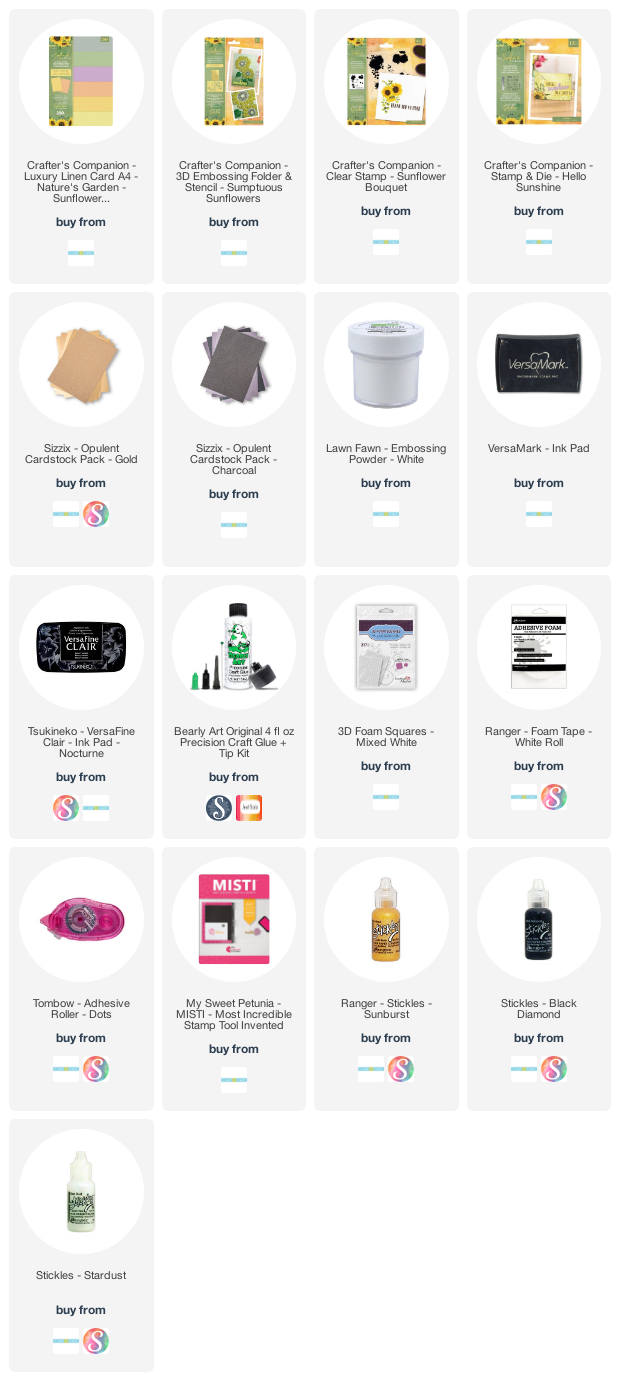
To start, I have to say that the Sunflower Bouquet layering stamps used here by Crafter's Companion have such a great realistic look! Once you stamp all the layers out you can really see those sunflowers come to life! I chose some yellows, browns and greens from my stash of Altenew inks and stamped out the sunflower repeatedly on a 6.75" x 4.75" white cardstock panel. Then I took the same colours but in a more vibrant/darker tone and stamped a single sunflower on a white oval die cut using the Spellbinders Fluted Classics Ovals. I also cut a 5" x 7" orange canvas cardstock piece and from that I cut the next largest oval. I adhered everything onto my white 5" x 7" card base, adding some yellow polkadot ribbon and propping up the center oval with foam.
I added the white heat embossed "YOU ARE MY" sentiment using the Hello Sunshine stamp and die set. And then I die cut the "sunshine" sentiment 3 times from black and once from Sizzix Opulent Charcoal Metallic cardstock. I adhered them together to form a thick die cut and attached it to the oval. Finally I finished this card off with some Sunflower Bling Mix embellishments and Star Dust Stickles on the center of the focal point sunflower.
Card 2
This is a really simple yet stunning design. I stamped the Sunflower Bouquet in some deep blue Altenew inks around the edges of a 5.25" x 4" white cardstock panel. I left a white center to allow myself to stamp out the "Thank you so much" sentiment that comes with this set in Versafine Claire Nocturne ink. I then used a rectangle die from Pinkfresh Studios Folk Edge Rectangles set to cut a rectangle from the center. I adhered the frame with foam to an A2-sized white card base and adhered the center rectangle with Tombow dot runner adhesive. This creates a cool dimensional look! I finished this card off with clear gems and Starr Dust Stickles in the sunflower centers.
Card 3
Embossing folders with coordinating stencils are all the rage right now! This card uses the Crafter's Companion Sumptuous Sunflowers 3D embossing folder and stencils set. And this is a nice large folder, perfect for 5" x 7" cards like I love to make!
I used the embossing folder first to emboss a white cardstock panel just under 5" x 7" in size. I then added ink using the 2 stencils and some yellow, brown and green Altenew inks. I added more brown ink around the flowers carefully with my blending brush while darkening the edges. I cut down the panel slightly and matted it onto a green canvas cardstock panel, then adhered it to a 6.75" x 5" white card base. I added the stamped "Sending You" from the Hello Sunshine stamp and die set with foam squares. I also added the die cut "sunshine" sentiment, cut from Spellbinders glitter foam, in a curved fashion just above the bottom sunflower. I thought this added a bit of interest to this card. I finished this card off with the Sunflower Bling Mix embellishments as well! And I also added some Sunburst Stickles to the flower petals and Black Diamond Stickles to the flower centers for some shine.
Card 4
My final card is my favourite and was actually really simple to put together. I used the Sumptuous Sunflowers 3D embossing folder to dry emboss a blue cardstock panel. Then I used some white pigment ink with a blending brush to lightly add some white ink to the embossed sunflowers which makes the image stand out more. I also used some gold metallic pigment ink with a blending brush and lightly brushed that over the sunflower too. To make image stand out even more, I used some darker blue Altenew inks to darken the edges of the panel with a blending brush. I made sure to apply more pressure near the edges and lightly blend inwards, and stop at the sunflowers. I then took my iridescent watercolour inks and splattered some white, gold and silver iridescent paint onto the panel with a wet paintbrush.
I added some gold twine near the bottom of the panel and fastened it to the back of the panel with tape. Then, I grabbed a black cardstock piece and adhered the "sunshine" sentiment die cut out of gold glitter cardstock. I stamped out the rest of the sentiment using the Hello Sunshine stamp set and heat embossed it in white. I propped this up with foam squares on top of the gold twine at the bottom of the panel. Then I adhered this to a 5" x 7" white card base. Finally, I embellished this card with some gold metallic and clear AB gems.
And that is my inspiration for the Flower Power Hop! I hope you were inspired! Thanks again for stopping by and please remember to comment for your chance to win!
Have a Great Day!
(note: Any products not included here are linked within the blog text)


Comments
Post a Comment
Please leave me a comment as I always love hearing from you! 😃