Selective Stenciling | The Maker's Movement
Hello Crafters and Welcome Back!
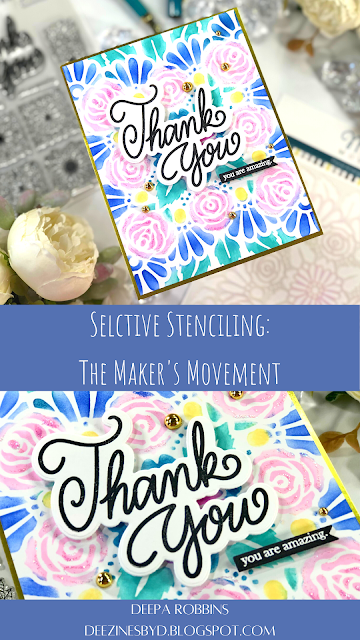
Layering stencils are so popular now, especially if you want to add various colours to your card. With today's card, I wanted to show you that you can use one layer stencils to add multiple colours and get a makeshift layered stencil look. This card features products from The Maker's Movement and is the result of using smaller stencil brushes and selectively stenciling one 6 x 6 inch stencil.

Shop The Maker's Movement July Release
.png)
Watch the Video Short On YouTube!

Like what you're seeing? Pin this picture for later on Pinterest!
To start I used a white card panel, sized 4" x 5.25" (slightly smaller than an A2-sized panel) and placed it securely under the Maker's Movement Floral Arrangement 6x6 Stencil. I used a bit of washi tape on the underside to hold it in place. I then grabbed my smaller blending brushes (many companies have these available nowadays) and added the following Altenew inks, in a selective fashion:
Baby Pink
Fuschia
Azurite
Desert Night
Lagoon
Sunray
Since this stencil is pretty intricate, I couldn't mask off areas effectively. That meant that I had to carefully make sure that my ink and brush bristles only went into the openings that I wanted them in. In some places you can see some overlap, but that's okay because it adds to the artistic look of this method. Don't despair, carry on and once all the colours are added you will be surprised at how stunning it looks. And any major boo boos can be rectified with an added embellishment here and there.

I then matted the panel onto gold mirror cardstock and onto a white card base, both A2-sized. I used the Maker's Movement Thank You Stamp and matching Thank You Die Set to stamp the sentiment in VersaFine Clair Nocturne ink. I also heat embossed the sub-sentiment with white embossing powder on black cardstock and cut these out with the coordinating dies. I added both sentiments to the card with foam tape. Since the stenciled image is so vibrant and busy, there isn't much extra needed on the card except the sentiment. So all I did after this was embellish it with some Pinkfresh Studio Gold Metallic Pearls and I added some Diamond Stickles to the stenciled pink roses for some shine.
And voila! There is my makeshift layered stencil panel made with only one stencil! I hope you've been inspired to make something similar yourself. All of the products have been linked below for your shopping pleasure!
As always, thanks for stopping by. And don't forget to leave me a comment, as I love hearing from you! And don't forget to follow me on Instagram @deezinesbyd where you'll find a bunch more inspo!!
Supplies
(note: I will always try to link the exact product or something similar)


Comments
Post a Comment
Please leave me a comment as I always love hearing from you! 😃