Black Watercolour Paper and the Coneflower | Make the Cards Challenge 34
Hello again!
For today's Make the Cards Challenge 34 post, we have another colour challenge! This one is called peachy keen and I am keen to get started on this one. I recently saw a technique with Black Watercolour cardstock and metallic watercolour paint and just had to try it. I watch a lot of YouTube videos for inspiration but I think this one is credit to "Lady Michelle" on Facebook.

Challenge Post:

VIDEO:

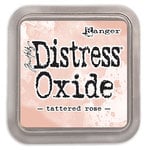
So to get started all you really need is some black watercolour paper - I used Legion Stonehenge Aqua Watercolor Pad, 140lb, Cold Press, and some metallic inks and/or Oxide inks. For the metallic inks, I used my Yasutomo Pearlescent Watercolour Paints and I chose to use Tattered Rose and Dried Marigold Oxide inks.
I laid down my craft mat and smooshed some of each oxide ink onto the mat. I sprayed a mist of water onto the inks with my spray bottle and then put my black watercolour cardstock cut to 5" x 7" onto the inks. I wiggled the cardstock around a bit to let the ink soak in and then dried it with my heat gun. I then built up layers of colour by repeating this process a few times. I actually found that the Dried Marigold created more of an orange colour, so I opted to use more of the Tattered Rose. This creates a nice, cloudy look on the black cardstock. Then to add more interest and shine, I used my Yasutomo Pearlescent Watercolour Paints to flick droplets of paint in pearlescent silver, white and peach onto the cardstock using my paint brush and acrylic block. I set this aside to dry while I die cut and assembled my coneflowers.

I used the Honey Bee Stamps Coneflower Die set to cut each layer 2 times - some from white cardstock and 1-2 layers of each from Sizzix Opulent Silver Metallic Cardstock. This set has 4 layers of petals, 2 of the center and 2 mirror leaf pieces. I cut the leaves from Sizzix Opulent Silver Metallic and Charcoal Cardstock. And I cut the centers from black (bottom layer) and Sizzix Charcoal cardstock (top layer). For the white layers of petals, I used Concord & 9th Grapefruit and Sorbet ink along with the Tattered Rose Oxide ink, to do some ink blending along the petals creating a bit of a gradient in colour from lighter to darker ink.
I assembled the flowers layer by layer by applying BearlyArt Glue only to the center of the flower (or the nose) which is going to get covered anyways. Then I took my foam squares and added them in between the petals to create more dimension. I adhered the center of the flower and you can really see the layers in the next picture.

This set does not come with a stem so I used the Altenew Lily Craft-A-Flower set to cut 2 stems from white cardstock. I then arranged and adhered the flowers, leaves and stems to the black watercolour panel (once dried). I cut off any overhanging pieces.
For the sentiment, I heat embossed with Hero Arts Fine White Detail embossing powder, the "I hope your feel beautiful today" stamp from the PinkFresh Studio Anemone Magic Stamp set. I did this on the same Sizzix Opulent Charcoal Cardstock that I used for the flower centers. I cut the strip tp size and adhered it to the card panel with the flowers. I finished the card front off by embellishing it with Trinity Stamps Bubble Blower and Boiled Sugar Embellishments to simulate water droplets.

For the card inside, I cut a 10" x 7" center folded card base from heavy white cardstock. I ink-blended from dark to light, the Sorbet and Grapefruit C9 inks and Tattered Rose Oxide ink using my blending brushes. I have a few craft brushes from Amazon but I have to admit that I prefer the actual makeup blending brushes. I just find that the ink comes off so easily and I can use the brush on an oxide ink one day and a dye ink the next. This is as long as I've cleaned off the brushes with a bit of water on a cloth, and I have no harden bristles or anything - they stay smooth. Keep in mind I haven't tried any of the craft brand name brushes, so maybe these are better but I just haven't found the money in my budget to explore this option yet.
Next, I used my VersaFine Clair Nocturne ink to stamp out some floral and leafy images from Altenew's Hello Sunshine Stamp Set. Finally, I stamped the main sentiment from the same set used on the front, the PinkFresh Studio Anemone Magic Stamp set.
After attaching the front panel to the card base, I was done! And there you have the final product. I hope you have been inspired and go ahead and leave me a comment as I love hearing from you! And don't forget to join the challenge over at the Make the Cards Challenge blog!


- Altenew - Dies - Craft-A-Flower: Lily Layering

- Price: $35.99


- Hero Arts - Embossing Powder - White Detail
- Price: $5.84
- Bearly Art - Precision Craft Glue - The Original

- Price: $14.99
- Tsukineko - VersaFine Clair - Ink Pad - Nocturne

- Price: $8.57


Beautiful work! Thanks for your explanations, also. Just a delightful card, both inside and out!
ReplyDeleteThank you Joyce!
Delete