A place to share all of my creations from cards: inside and out, to scrapbook layouts and anything else that may inspire creativity!
Get link
Facebook
X
Pinterest
Email
Other Apps
Layered Cistus Z-Fold Card | Using Glittered Cardstock
Hello Again!
For today's post I have a Z-fold card that I made using the beautiful Cistus flower 3D layered dies from Altenew. And to jazz this card up a bit, I decided to use some glittered cardstock to my layers. This may look complicated compared to a normal center or top folding card, but it's actually easy to do and you just have to make 1 extra score in your cardstock to achieve this look!
So let's get to it!
Watch the Video on YouTube
Like what you're seeing? Pin this picture for later on Pinterest!
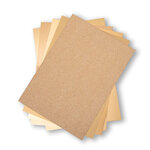
I started by adding ink from my ink pads to some white cardstock to make coloured- cardstock. I don't have green cardstock in the colours I wanted so I find this technique comes in handy. You can also use this technique to match cardstock to the inks you use in your projects to create coordinating products. I used Altenew Shadow Creek, Mountain Pine and Evergreen inks and then set these aside to completely dry. I'll come back to these later.
Then I cut out all of the layers of my flowers and leaves with the Altenew Craft-A-Flower Cistus dies. There are 2 flowers in this set and I chose to cut out 5 in the following manner:
I adhered these layers together using the layering guide on the Altenew packaging and some BearlyArts Glue. I do want to mention that I glued the white cardstock to the vellum first and then added glue on the vellum where it would be covered up by the white cardstock, when adhering this to the glitter cardstock layer. I cut out the leaves in the same manner - there are 2 leaves in the set, 3 layers each, ad adhered them together as well.
bottom layer - Shadow Creek Altenew ink coloured cardstock
Middle layer - Mountain Pine Altenew Ink coloured cardstock
Top Layer - Evergreen Altenew Ink coloured cardstock
Constructing the Card base
I suggest picking a cardstock in a colour you want to compliment your flowers. I used a full size piece (8-1/2" x 11") and cut it into a 7" x 11" piece. Then I cut it at 5" in on the long side (see diagram below or watch the YouTube Video linked above for more clarity on this process). This gives you a 5" x 7" and 6" x 7" piece of cardstock. Take the bigger piece and score it at 1/4" inwards from the longer side. This creates a flap to attach the two card pieces together. Next, you can measure half way in from the score line or fold your cardstock towards the fold line to find your center (red dotted line in diagram below). Then score at this point to help create a nice fold. Add some Scor-Pal strong double sided adhesive to the 1/4" flap. Line up both sides of the card and adhere the flap. Next, you can fold the scored line in the center of the front of the card outwards. This creates the Z-Fold and your card base is complete.
I decided to use some gold foil diagonal striped paper from a pad, Craft Smith Love Story 12" x 12" Pad, that I had in my stash. I cut a panel big enough to cover the right side of my card inside, which would show through to the front and adhered this. I then cut a strip of Sizzix Opulent Gold Glitter cardstock and added this to the join between the card base and striped cardstock that I just added. I made it so this would only be seen on the card inside. I also cut a piece of white cardstock that would leave a 1/4" border on the inside of the card. I will attach this once I have assembled more of my card.
I had some sentiments laying around that I had foiled and die-cut a while back. I used the Pinkfresh Studio Perfect Sentiments hot foil plate and die and Spellbinders Polished Brass Foil for the Happy Birthday sentiment. I love using these products for this because I get a bunch of sentiments ready for use and I can just keep them in a small box for when I need them. It is such a time-saver and these Pinkfresh Studio sentiment products work great for this!
For the "Dear Wife" sentiment, I used the Hero Arts Brushed Strokes stamp set, stamped out my words and heat embossed them with Altenew Rose Gold EP. This particular set is discontinued (I've linked something similar at the end of this post) but there are so many letter sets like this out there. I recommend having 2 or 3 of them in different fonts for building your own sentiments like this. Some stamps like this one work by having to stamp each letter one by one, but I know Lawn Fawn has a few sets in which you can line up your letters and stamp them all in one go. They also provide 2 or 3 stamps in common letters (like vowels) to make this easier to do. I find these so helpful in making custom cards.
To arrange my flowers on the card front, I used some washi to tape down the card base so it doesn't pop up. I arranged my flowers and leaves, making sure I bunched them enough so that they create a solid image. I used Press n' Seal to pick up these pieces and used washi tape to indicate where I should place glue. Remember, half of this arrangement will be hanging over the edge of the card and you don't want to stick this to the card inside or you won't be able to open the card. I added my glue and adhered the front, waiting until it was dry to remove the Press N' Seal carefully. Then I used my Nellie's Multi Frames Oval dies to cut and oval from the same coloured cardstock as the card base. I placed this behind the overhanging images from the front to make the inside look more neat and clean. I could then take my glue and adhere the little overlapping flaps of all the die-cut images.
I added my sentiments with foam squares to the front. I stamped my inside card sentiment onto the white cardstock insert piece I cut earlier. I stamped a happy birthday sentiment from Altenew Dotted Blooms stamp set using VersaFine Clair Nocturne ink for the print and VersaFine Clair Warm Breeze ink for the handwritten portion. I like doing this because it helps me match my sentiment to the colour scheme. I adhered this to the card inside ensuring it fit snuggly against the glitter strip of cardstock. Finally, I embellished this card with PinkFresh Studio Jewels Mix in White and AB Crystal LolliBead gems. I also added some PinkFresh Studio Jewels mix in peach fuzz to the centers of the flowers for added shine.
And there you have my card for today! I hope you have been inspired and go ahead and leave me a comment as I love hearing from you!
Supplies
(note: Any products not included here are linked within the blog text)


Comments
Post a Comment
Please leave me a comment as I always love hearing from you! 😃