Two Backgrounds, One Die | Spellbinders Color Block Backgrounds Collection
Hello Friends!
I have some more pretty Spellbinders products to share with you from the Color Block Backgrounds Collection available in the Spellbinders' store now! These backgrounds make cards fast and easy to make! Here are 3 more card ideas, one of which I have a YouTube Tutorial below.

All of these products can be found in the product list at the end of this post. Please feel free to click and shop. These are affiliate links, meaning that if you click on them and purchase something, I will earn a small commission at no additional cost to you. It simply helps me keep bringing you more inspiration! I appreciate any and all support - Thank you! 💜
I've included a YouTube Video Tutorial below, if you are interested!
Watch the Video on YouTube
.png)
Like what you're seeing? Pin this picture for later on Pinterest!
Card 1
.png)
For the first card, I used the Color Block Southwest Cover Die to cut out various colors of cardstock including brown glitter foam. I used to foam to create an element of dimension along with propping up some of the cardstock layers with foam tape. I featured 2 backgrounds here but potentially could have made 5 backgrounds all together! So you this die is really a great tool for fast mass production. I finished this card off with a Birthday Sentiment and Balloons from the Spellbinders Open Road Collection released last month! You can find a more detailed process in the YouTube Tutorial linked above!
.png)
Card 2
.png)
I used the same process as I did for the first card except I made this one a portrait style card! The only difference is that I added the pieces in a different order and I finished this card off with the Best Dad Prize Badge using products from the Spellbinders Happy Dance Collection released last month! You can find a more detailed process in the YouTube Tutorial linked above!
.png)
Card 3
.png)
For my final card, I used the Color Block Slimline Edges Dies to cut out many scalloped strips from different coloured cardstock. I used my Altenew inks to add colour to white cardstock to get the colour palette I wanted this time. All of the inks used are listed in my supplies list. I then diagonally lined the strips and adhered them on a 6.75" x 4.75" white cardstock panel. I added two strips of Gold Mirror Cardstock on either side of the scalloped strips to highlight the sentiment area. I adhered the sentiment which was cut from some Spellbinders Light Pink Glitter Foam using the word dies from the Half Slimline Oval Die set. I've said it before but this foam is so easy and inexpensive to create dimensional elements.
I then cut out some flowers using the dies from the Mini Blooms and Sprigs set and added them beside the sentiment for some interest. The leaves were chosen from leftover pieces I'd cut out from past projects. Quick Tip: I always keep any extra die cut pieces in a container to sort through and use when looking for quick elements to add to my cards. It not only saves time but prevents waste! Finally I finished this card off with some clear gem embellishments. This was also a really quick one to make, so these dies are really come in handy when you're short on time but still want to create something stellar!

And that is my card inspiration for the Color Block Backgrounds Collection! So I tried my best to use these geometric layers with foam for added dimension. I hope you have been inspired! All of the products used here have been listed below - Happy Shopping!
Also, don't forget to check out/follow me on my Instagram account @deezinesbyd. I will be posting reels of these and other creations featuring this months' Spellbinders release throughout the month!
Have a Great Day!
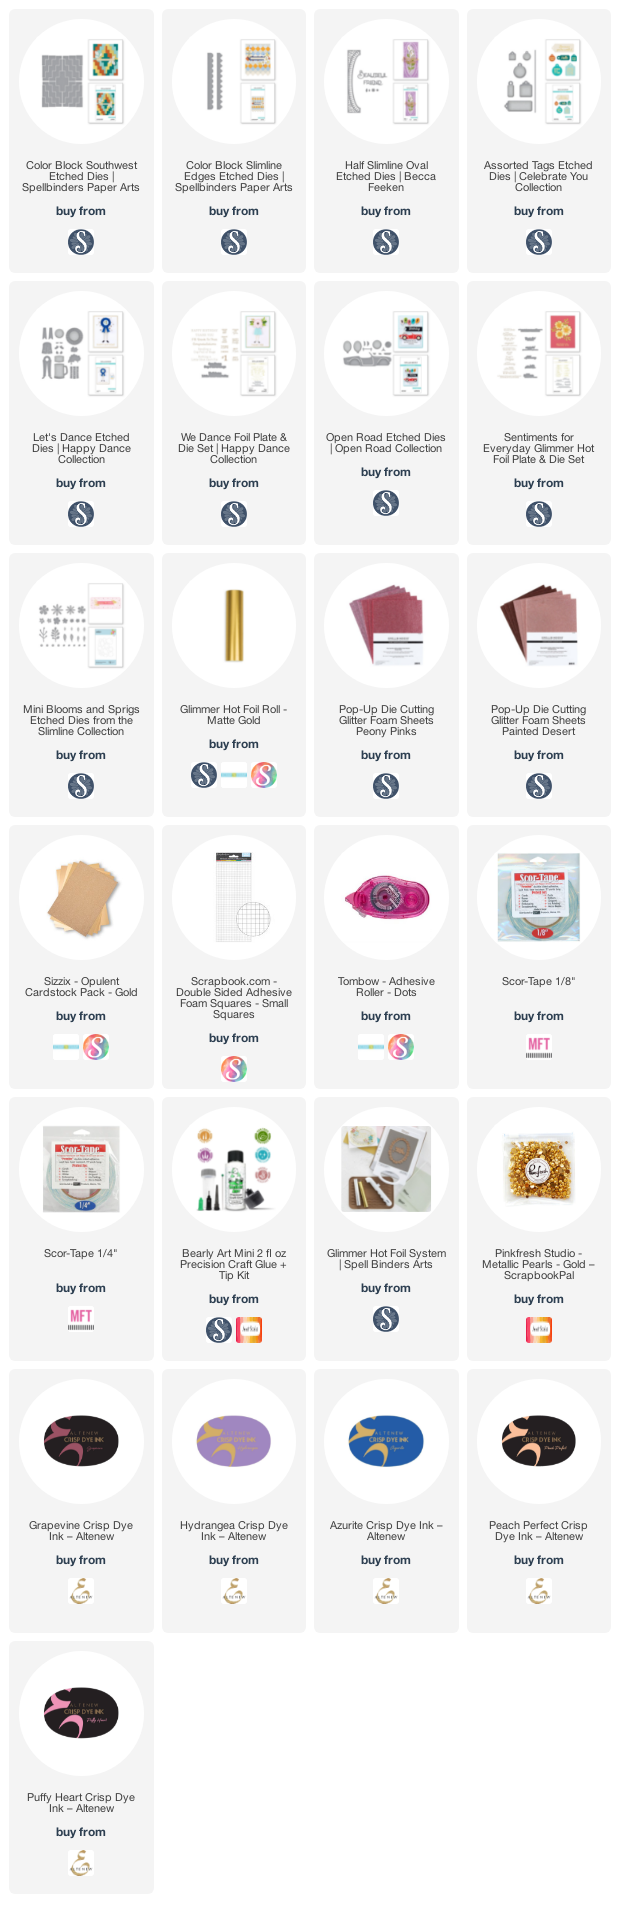
Supplies
(note: Any products not included here are linked within the blog text)


Comments
Post a Comment
Please leave me a comment as I always love hearing from you! 😃